Basic Functions in Custom Modules
Let’s take a look at how you can create a custom module and add the required fields in Zoho Books.
For example, you can create a custom module called Debtors, if your organization requires you to track the loans you provide in Zoho Books.
Create Custom Modules
To create a custom modules in Zoho Books:
- Click Settings on the top right corner of the page.
- Click Overview under Custom Modules.
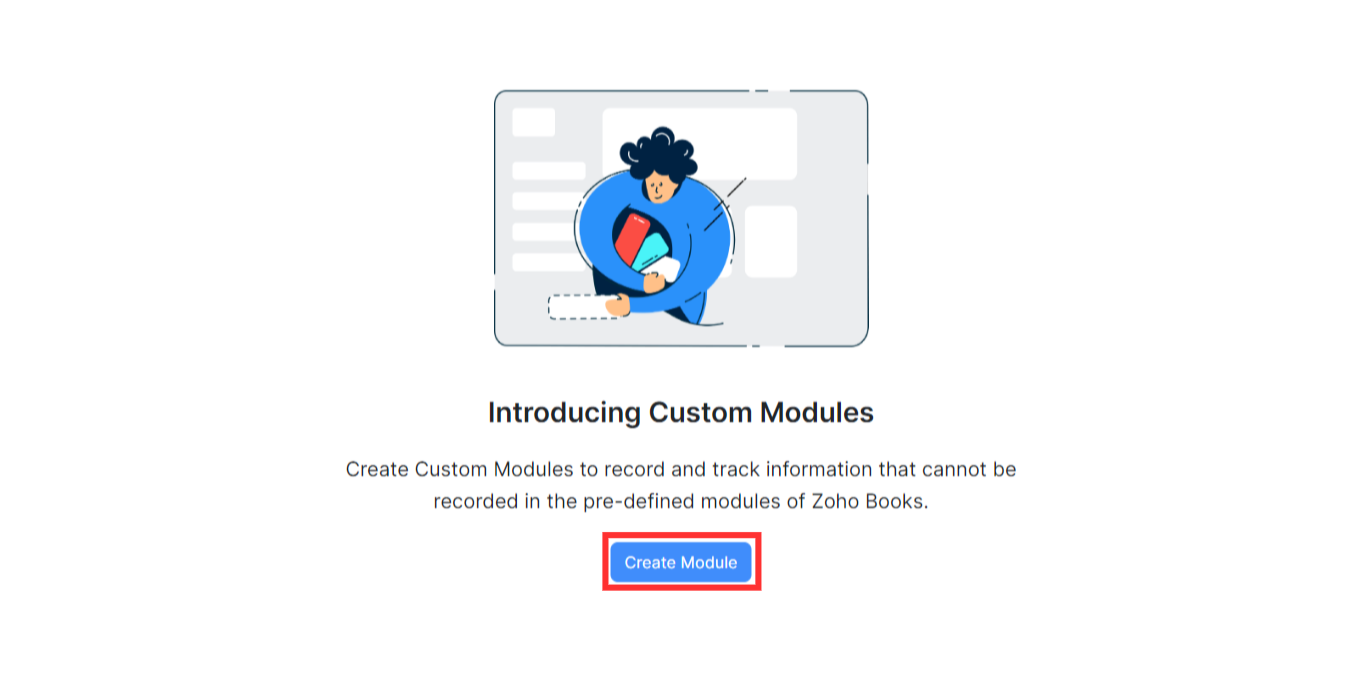
- Click Create Module at the center of the Custom Modules page.
-
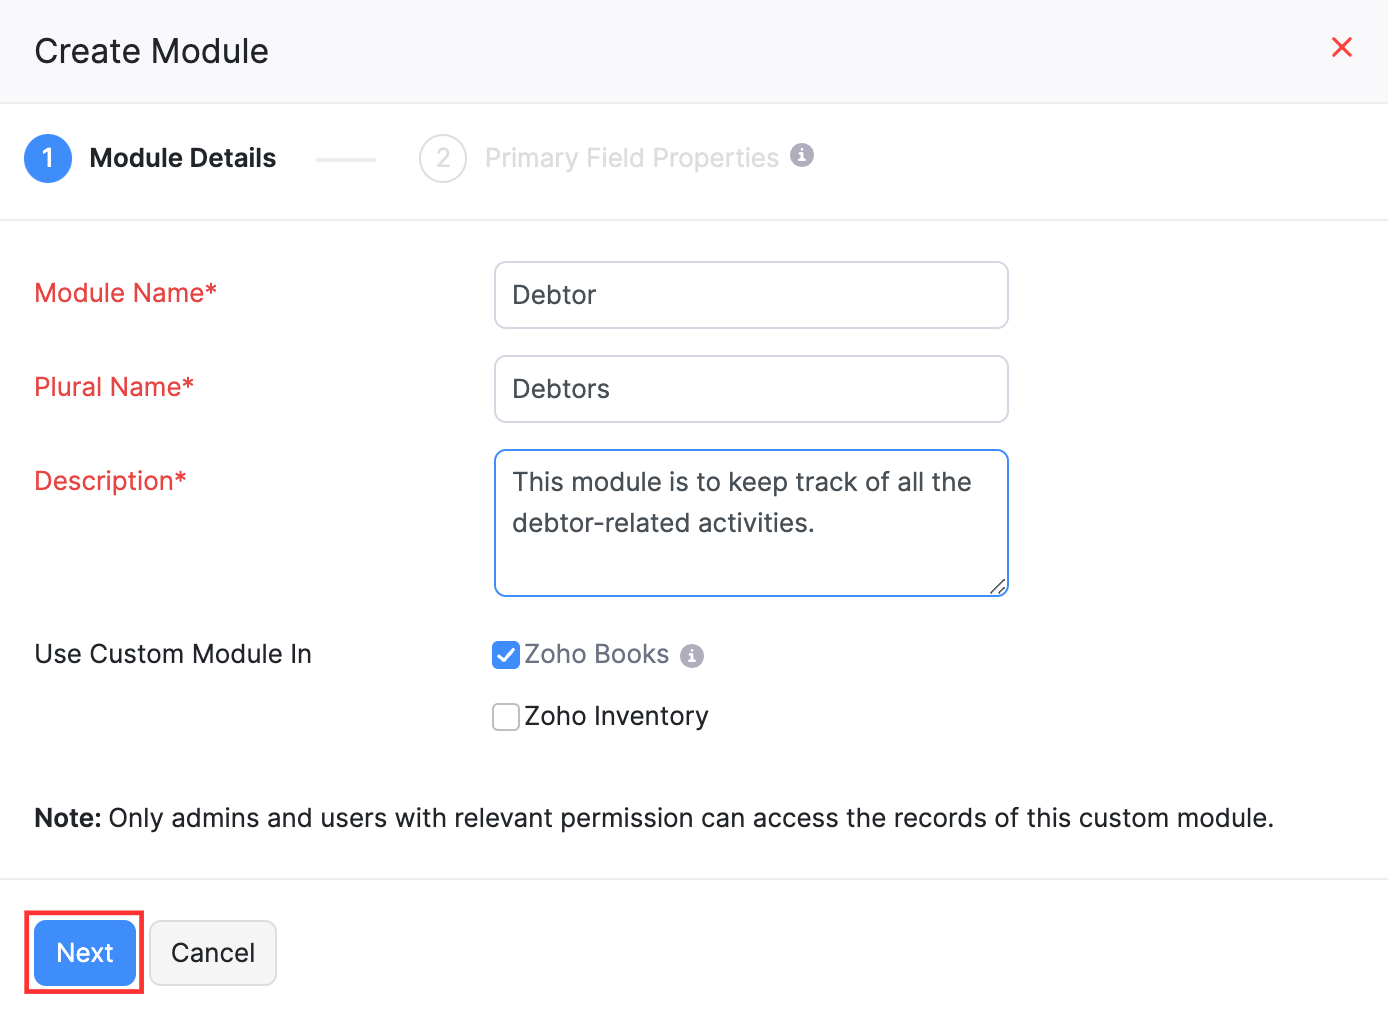
A pop-up will appear. In the Module Details section:
- Enter the Module Name, Plural Name (plural form of the module’s name), and the Description.
- If your organization is integrated with other Zoho Finance apps and you want to use the custom module in those apps, select the integrated apps in the Use Custom Module In field.
- Click Next.
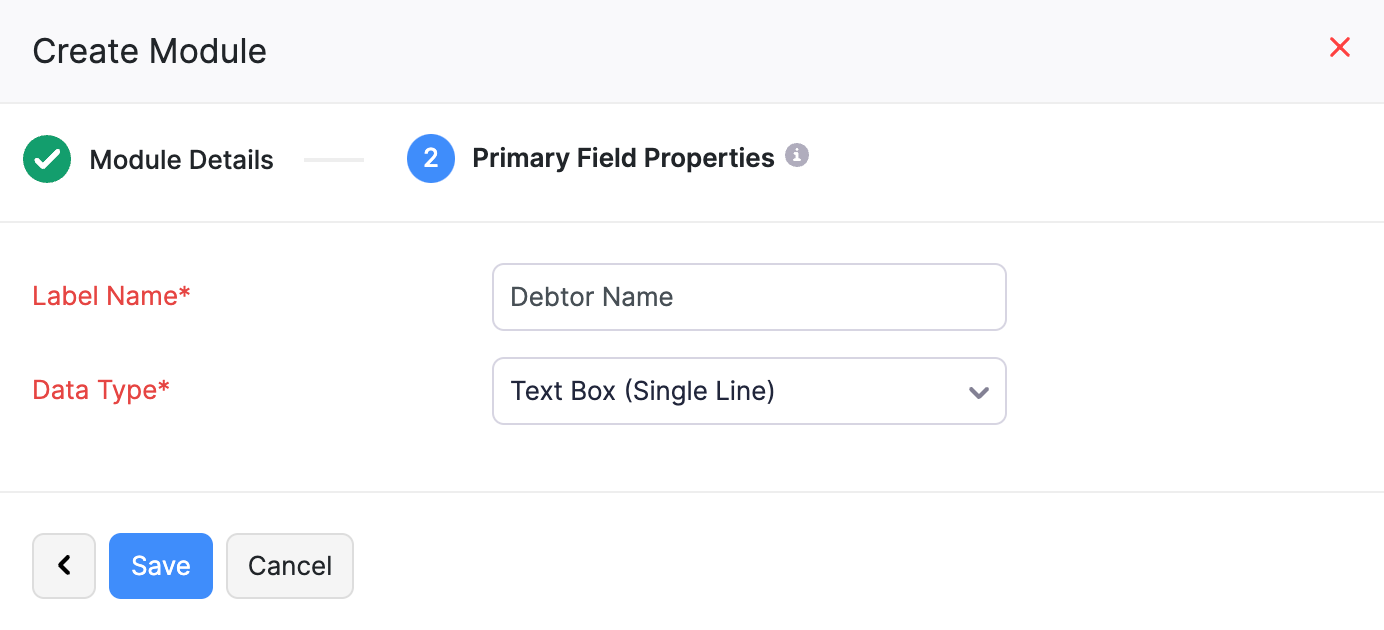
- In the Primary Field Properties section:
- Enter a name for the primary field in the Label Name field and select its data type from the Data Type field.
- Click Save.
Insight: A primary field is required to create a custom module. This field will be used to identify the custom module’s records.
Insight: You can edit the name of the primary field later if required. However, you will not be able to delete the primary field.
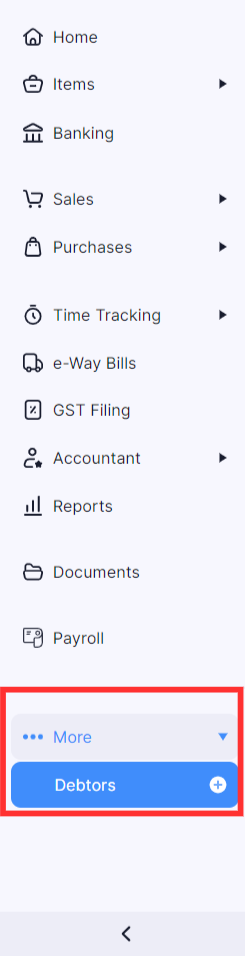
The custom module you create will be listed under the More section on the left sidebar.
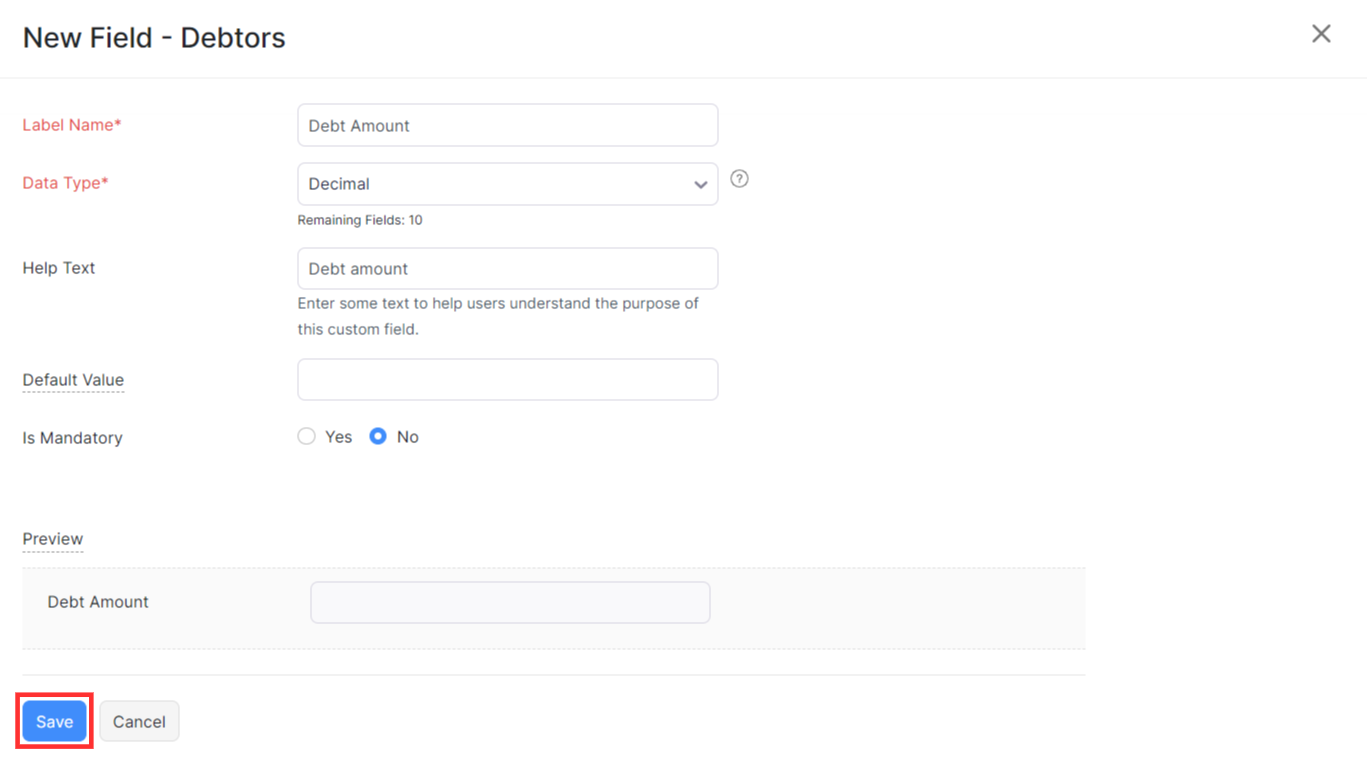
Add Fields
To help you fully craft your custom module, Zoho Books provides you the option to create fields with different data types. Here’s how:
- Click Settings on the top right corner of the page.
- Under Custom Modules, click the custom module for which you want to create new fields.
- Click the Fields tab at the top of the page.
- Click + New Field in the top right corner.

- Enter the necessary details.
- Click Save.
You can edit, delete or mark a custom field inactive in Zoho Books.
Insight: Each data type has a certain limitation to the number of custom fields that can be created.
Add Records
Once you’ve created a custom module and added fields, you can create a record and enter the details. Here’s how:
- Click More in the left sidebar and select the custom module (say, Debtors) in which you want to create a record.
- Click the + New button on the top right corner of the page.
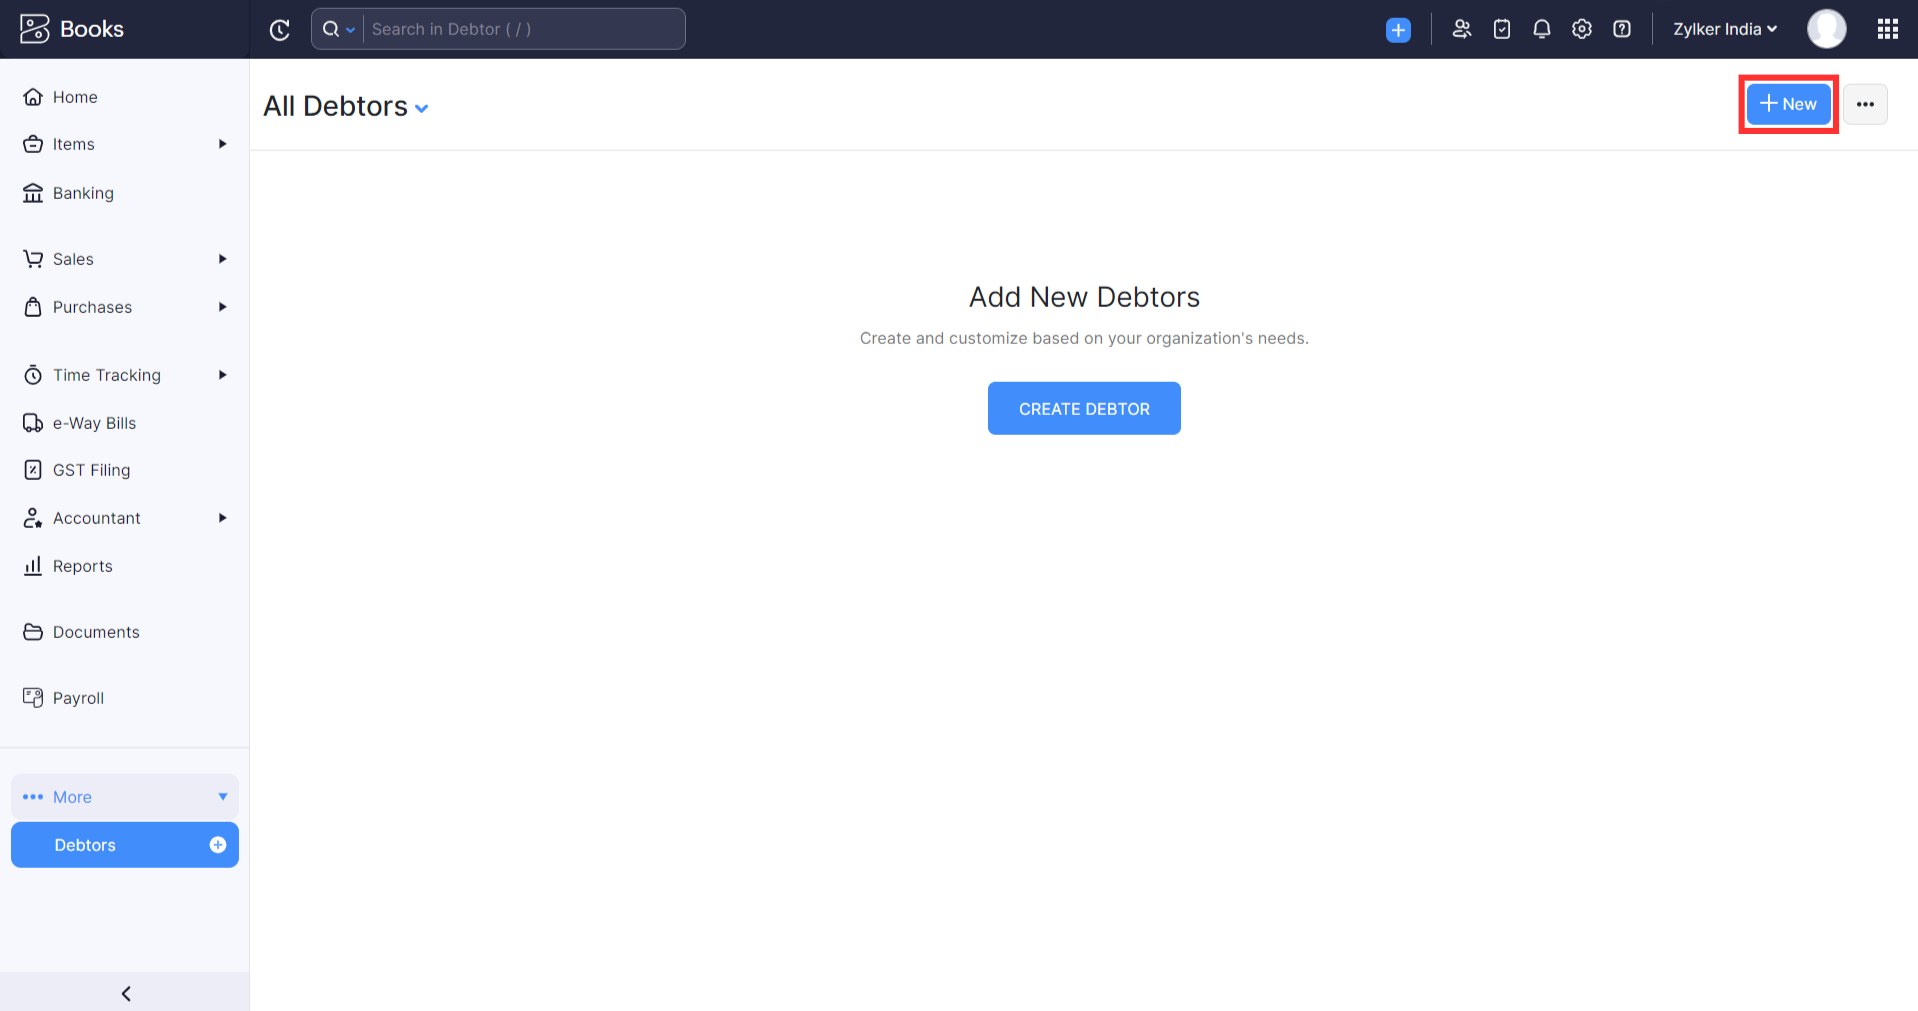
- Enter the necessary details.
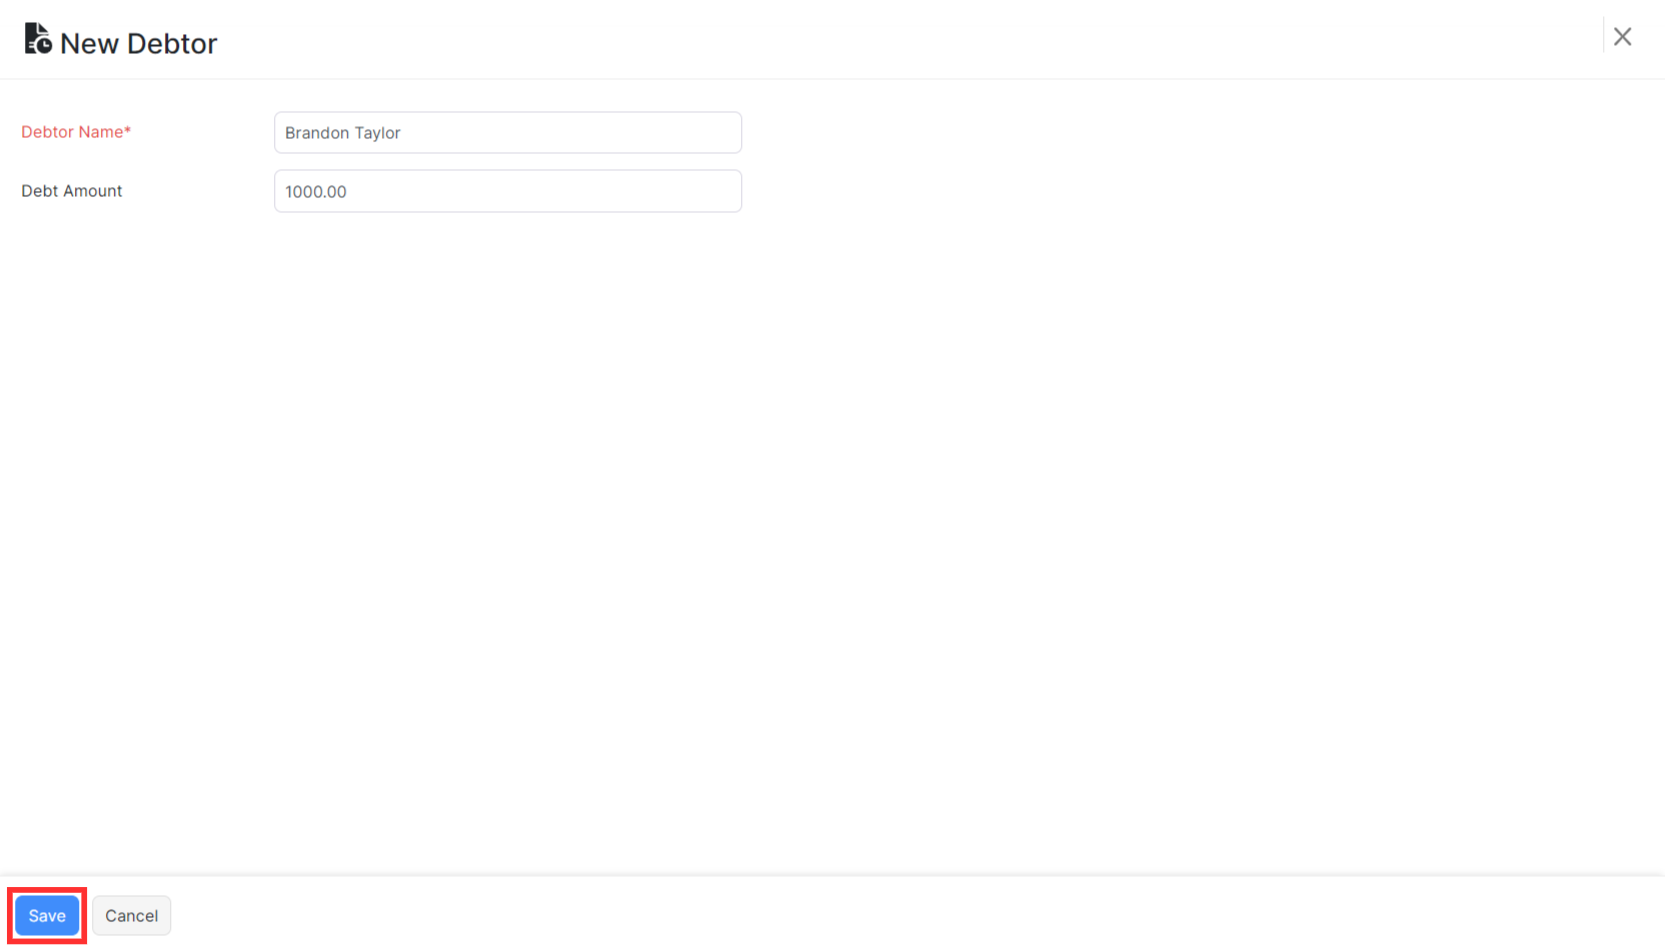
- Click Save.
Insight: Records are the data entered in the custom module. For example, an invoice you create would be considered a record in the Invoices module.
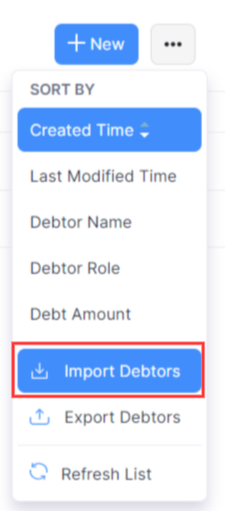
Import Records
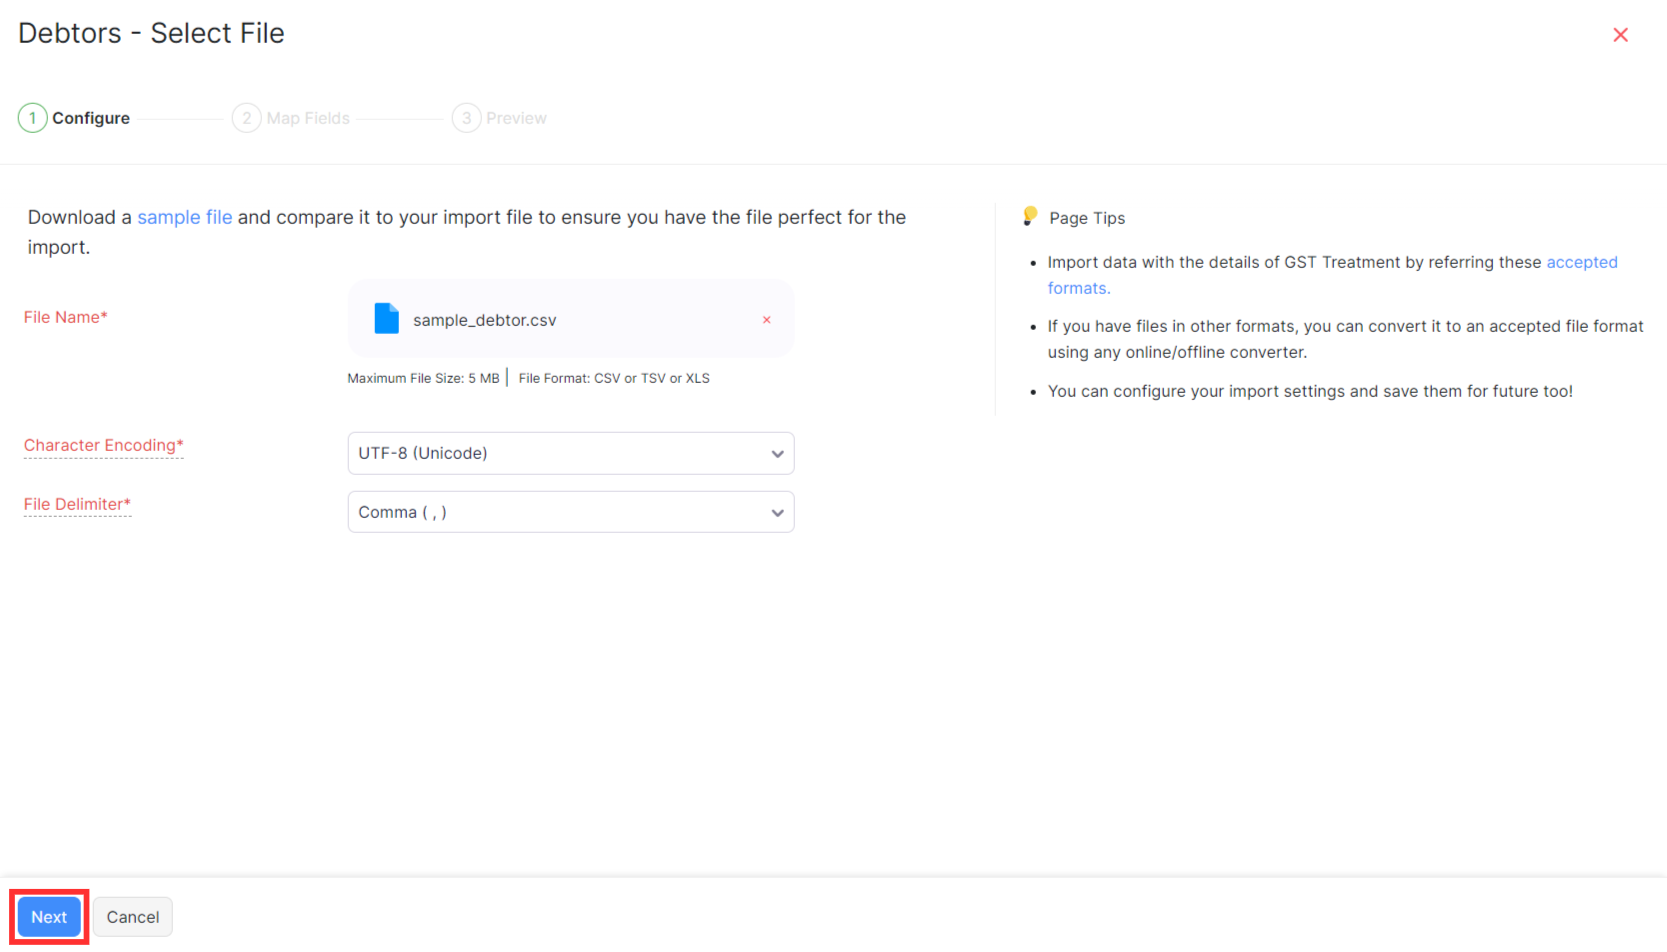
If you have records for your custom module records in a different software, you can import them. Here’s how:
- Go to More and select the custom module (say, Debtors).
- Click the More button on the top right corner of the page.
- Select Import Custom Module (Debtors, in this case).
- Click Choose File next to Upload File.
- Choose the Character Encoding for your file.
Insight: Character Encoding is used to pair numbers with characters. By default, the Unicode Transformation Format (UTF-8) encoding is used which supports a wide range of characters that go beyond 8 bits.
- Click Next.
- Ensure that all the fields are mapped correctly in the Map Fields page.
- Mark the box near Save these selections for use during future imports if you want to use the similar import format the next time.
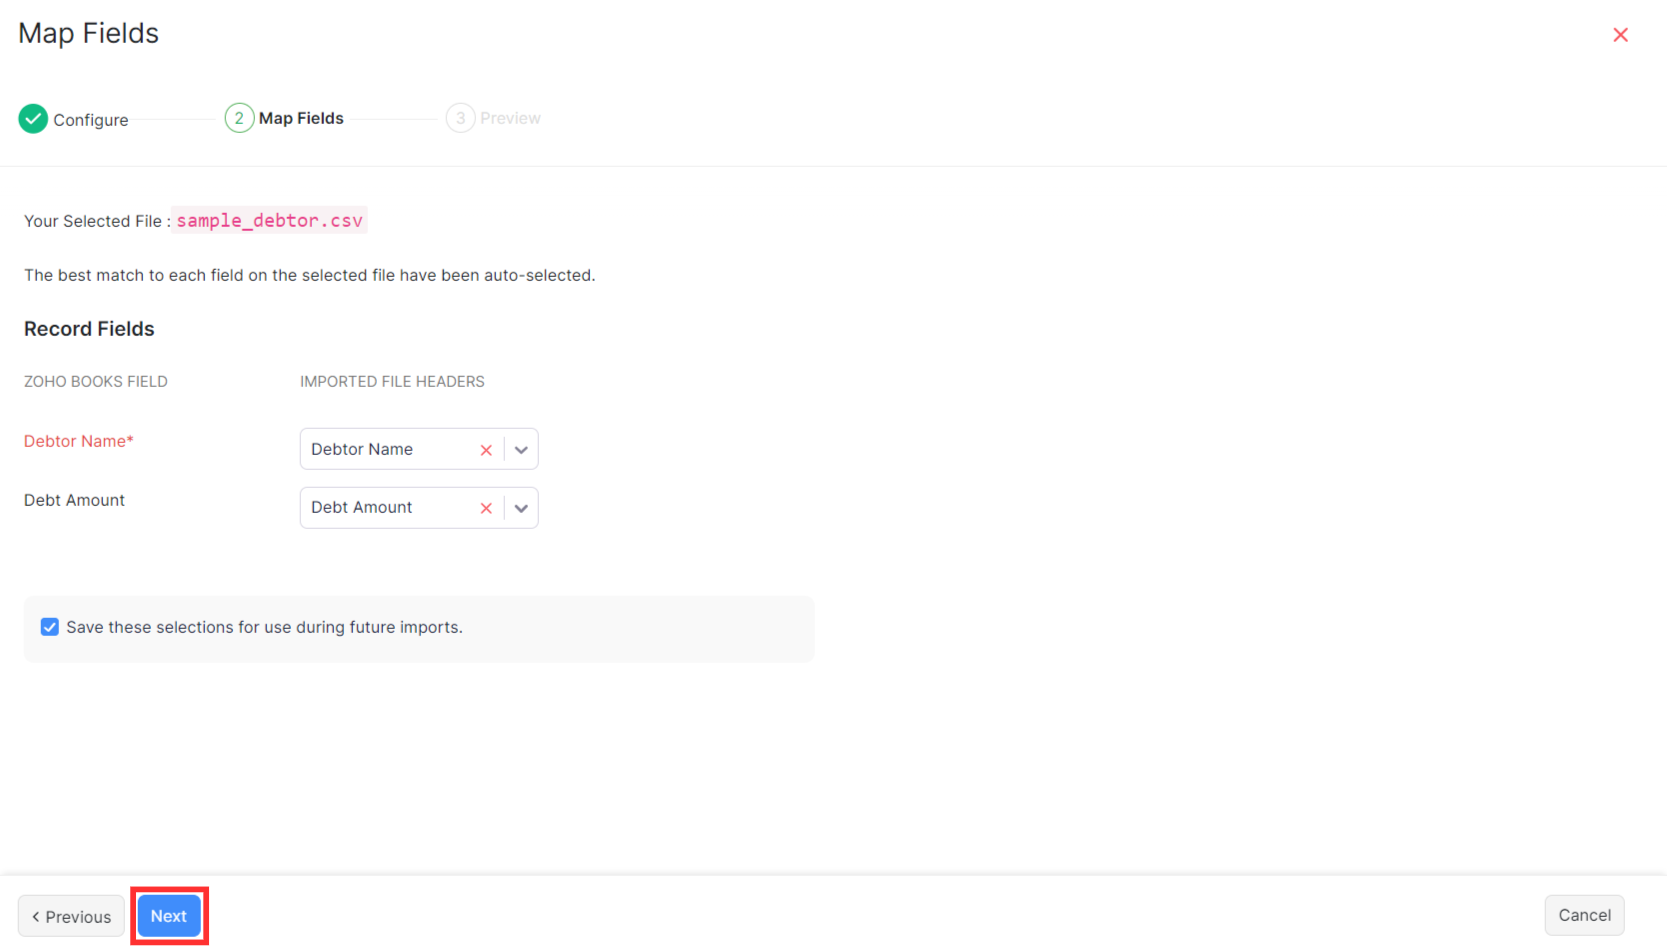
- Click Next.
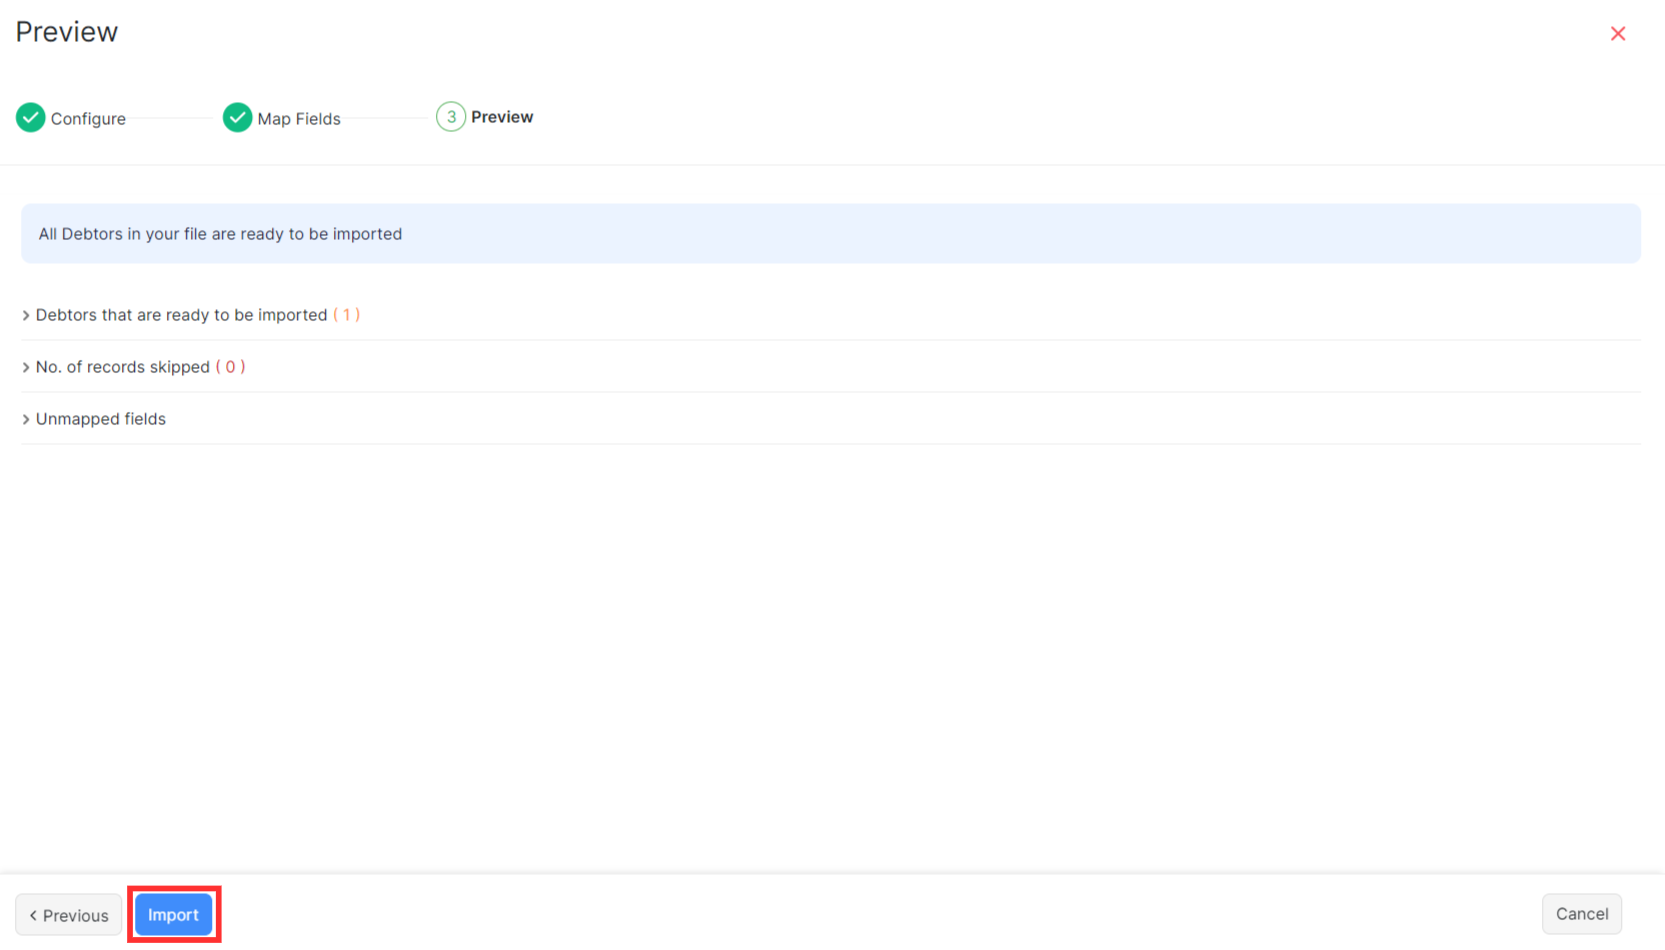
- On the Preview window, click Import.
 Yes
No
Yes
No

Thank you for your feedback!