
Most people use Google to find local businesses. Searches like “Restaurants near me” and “Best hairdresser in Austin” are growing rapidly.
If your business isn’t on Google, it’s like selling water bottles in a desert with no signboard—there’s demand, but no one knows you exist!
Let’s fix that. Here’s a step-by-step guide to creating and managing your Google Business Profile. This blog covers these areas:
Claim and request ownership
Create GBP
Google verification
Business Information
Attributes
Claim and request ownership
Before you jump in and create a new profile, it’s important to check if Google has already created one for your business. This can happen automatically based on online reviews, customer activity, map searches, or even data pulled from other business directories.
Tip: If you create a new profile without checking first, you risk having duplicate listings which can confuse customers, split reviews, and hurt your local search performance. The good news? If you accidentally create a duplicate, you can report the other listing to Google for removal or consolidation. Just make sure you’re managing the correct profile with the most accurate and complete information.
Why claiming your GBP matters
Your GBP is more than just a pin on Google Maps. It’s what customers see when they search for your business, check your reviews, or look for your operating hours. By claiming it, you:
Ensure your information is accurate.
Get control over photos, reviews, and posts.
Access insights and analytics.
Prevent others from misrepresenting your brand.
Let’s look at two main paths to get control of your profile.
Option 1: Claim a business profile (If the profile hasn’t been claimed yet)
Open Google Maps.
In the search bar, type your business name.
Click on the correct business name from the search results.
Click Claim this business and then Manage now.
To select a different business, click I own or manage another business.
Choose a verification option and follow the on-screen steps.

Once verified, you’ll see a badge that says “You manage this profile.” With that, you’re in!
Option 2: Request ownership of a claimed profile
If the profile is already verified by someone else (maybe a former employee or an old agency), here’s how to request access:
Go to business.google.com/add.
Enter the business name and address.
Select the correct business from the search results.
Click Request Access.
You’ll see a message saying “Someone else may manage this Business Profile.”
If you're authorized to manage it, fill out the form and click Submit.

Google then emails the current profile owner. They have three days to respond.
Note: If you're trying to request ownership of a service-area business (one that doesn’t serve customers at a physical location), you’ll need to contact Google directly and select Transfer ownership of listing in the support form.
What happens next?
After submitting your request:
If approved, you’ll be notified by email and get access after a short wait.
If denied, you can appeal or try contacting the current owner directly.
If no one responds in three days, Google may give you a chance to verify and claim the profile yourself.
A quick note on the seven-day waiting period
Once you become the new owner or manager, some features stay locked for the first seven days. For example, you can’t:
Delete or undelete the profile
Remove other owners or managers
Transfer primary ownership
If you accidentally delete your account within this window, you’ll lose access and need to be re-added.
Taking control of your GBP is one of the easiest wins in local SEO. It sets the stage for accurate information, better visibility, and improved trust with your customers. Whether you’re claiming an unverified listing or navigating the request process, don’t skip this step—it’s the foundation of your online presence.
Create a Google Business Profile
If you find there's no profile created for your business, create a new one.
Check these requirements before we begin.
To be eligible for a Google Business Profile, make sure:
You meet customers in person—either at your store or their location.
You have a physical address (staffed during business hours). Virtual addresses and PO boxes aren’t allowed.
You have a valid phone number that customers can use to reach you during business hours.
Step 1: Sign in to a Google Account
If you don’t already have one, create a Google account for your business. Avoid using your personal account to keep things organized.
Follow this guide to create a new Google account.
Step 2: Log in to the Business Profile Manager
You can access the Business Profile Manager in three ways:
Visit Business Profile Manager and click Get started.
Open Google Maps, click the menu icon (top-left), and select Add your business.
Right-click anywhere on Google Maps and select Add your business.
Step 3: Enter your business name
Enter your business name exactly as it appears in real life. If Google has already created a profile for your business, select it; otherwise, create a new one.
Tip: Business name should be exactly the same as your real-world name, specifically, under what name your business is currently operating. Ensure all your signage, stationery, and other branding items are identical.
If you become too greedy and stuff with keywords, the instant visibility boost will be just that—instant and short-lived. For example, avoid adding keywords like ''best restaurant in Austin'' or ''fine dining Mexican restaurant''.
Step 4: Choose a business type
Choose the ones that describe how your business operates:
Online retail (sells products/services online)
Local store (customers visit your location)
Service business (you visit customers or offer delivery)
The next steps may vary slightly based on your selection, but the main process stays the same.
If you choose online retail, you can add your website in the next step or do it later. For now, let's focus on the required steps.
Step 5: Select a business category
Pick the category that best matches what you offer. This signals Google to show your business in relevant searches.

Step 6: Add a business address
Note: Service Area Businesses (SABs) can skip to Step 8. Your address will be entered at the final step for verification. It will be hidden on your profile, and only the areas you serve will be displayed.
If you have a physical location, enter your street name, city, state, and ZIP code. Next, you'll see a list of businesses with similar names or addresses. Select None of these and continue.
Step 7: Adjust your location on the map
Make sure the pin is placed exactly where your business is. If needed, click Adjust to move it.
Step 8: Add a phone number
Enter a valid business phone number that customers can use to reach you during business hours.
Step 9: Agree to Google’s terms and verify your business
Google requires verification to ensure your business is real.
Now, it's all done. Your profile needs to be verified by Google.
Google verification
Verifying your GBP is a critical step to ensure your business is visible on Google Search and Maps. Without verification, your profile may not show up properly, and any updates you make might not be published. Google offers several verification methods, with video verification becoming more and more common as a fast and secure way to prove your business exists and that you are authorized to manage it.
Why verify your Google Business Profile?
Verifying your business confirms to Google that your business is real and that you have the right to manage its profile. Verified businesses experience better visibility in local search results. They also gain the ability to update key business information, like hours, photos, and services. Finally, verified profiles gain access to customer insights and key messaging features, which help increase trust from potential customers. Without verification, your profile remains limited and much less discoverable.
Google’s verification methods
Google offers several ways to verify your business, though it depends on your business type, location, and category. Here are the most common ones.
Video verification: Record a short video showing your business location, signage, and proof of operations using your mobile device. This method is often faster and more secure than waiting for postcards. Check out Google’s video verification guide to learn more.

Phone or SMS verification: Google sends a code via call or text to your registered business phone number. You enter the given code to verify.
Email verification: Google emails a verification code to your business email address.
Postcard verification: Google mails a postcard with a unique code to your business address. You enter the code online once you receive it. This is generally slower and less common now.
Live video call: A Google representative verifies your business live via video call, asking you to show proof of your location and operations.
Bulk verification: For businesses with 10+ locations, bulk verification allows faster setup after approval.
What you need to know
Video verification is becoming Google’s preferred method because it’s quicker and reduces the potential for fraud.
Check out Google’s video verification guide to learn more.

You’ll use your smartphone or tablet to record a continuous video that includes:
Your business location - Show your storefront or workspace, including clear signage with your business name. Capture nearby street signs or landmarks to confirm the address.
Business operations - Show branded equipment, products, tools, or marketing materials that prove your business is active at this location.
Proof of management - Demonstrate you’re authorized to manage the business by showing access to employee-only areas, unlocking doors, using cash registers, or displaying official documents like business licenses or utility bills.
Important note for service-area businesses (SABs): If you’re a service-area business (SAB) without a storefront, your video should still include evidence of your service area, such as street signs or landmarks, branded vehicles, tools, uniforms, and proof of management, like business documents or invoices. Check out this video on verifying a service-area business.
Step-by-step video verification process
Log into your Google account: Use the account connected with your GBP.
Start verification on mobile: Video verification must be done on a smartphone or tablet. If you start on a desktop, Google will show a QR code to scan and continue on mobile.
Enable permissions: Allow Google to access your camera, microphone, and location.
Prepare your video: Plan the sequence—start outside showing your storefront and signage, then move inside to show your workspace, equipment, and proof of management.
Record a continuous video: The video must be one continuous shot; no edits or breaks are allowed. Keep it steady and well-lit.
Preview and submit: Google now allows you to preview your video before submitting it to ensure everything is clear.
Wait for review: Verification can take minutes to several days. Google will notify you once it's done.
Tips for a successful verification video
Keep it short and clear: Aim for under two minutes. Show all required elements but avoid unnecessary footage.
Avoid faces: Google prefers videos without people’s faces to protect privacy. Focus the camera on your business assets.
Good lighting and stability: Record during daylight or with bright indoor lights. Use a tripod or steady hand.
Show multiple areas: Walk from outside to inside, showing doors, signage, and workspaces.
Have documents ready: Hold official papers steady and in focus for a few seconds.
Don’t show sensitive information: Avoid bank details, tax numbers, or personal IDs.
Practice first: Record a test video to check clarity and content before submitting.
Common issues and how to fix them
Even if you do everything right, you might run into some problems.
Video won’t upload: Check your internet connection and video file size (should be under five minutes). Try compressing the video or switching to a different network.
Verification fails: Review Google’s feedback carefully. Common reasons include missing signage, lack of proof of management, or a mismatch between the location in the video and the location listed on your GBP. Re-record the video to address these issues.
No verification options are available: If video is the only method but you can’t complete it, ask an authorized employee to help or contact Google support.
Long processing times: Wait up to seven days. If it’s delayed, contact Google support for assistance.
What happens after verification?
Once verified, your Google Business Profile will finally start to show up in Google Search and Maps with all the details you’ve entered. In addition, you’ll be able to update information like hours, photos, and services. You'll also unlock features like messaging and customer reviews.
Keep in mind that if you make major changes later (like moving locations or significantly changing your business category), Google might ask you to verify again. If you encounter any issues, don’t hesitate to use Google’s support resources or the Google Business Profile Community, where experts and fellow business owners share advice.
Once your business is verified, you're all set to add more information.
Business information
Now it's time to include relevant information to really get started with your Google Business Profile.
Start by filling out as many details as possible. If done right, this can be one of the best ways to imprint your business in a potential customer's mind. By spending a few minutes editing your Business Profile, you can give customers a clear-cut idea of what your business is all about.
Where to edit
With the same Google account, you created the Business Profile, search "my business" on search. The businesses you manage will appear. Click 'View Profile.'
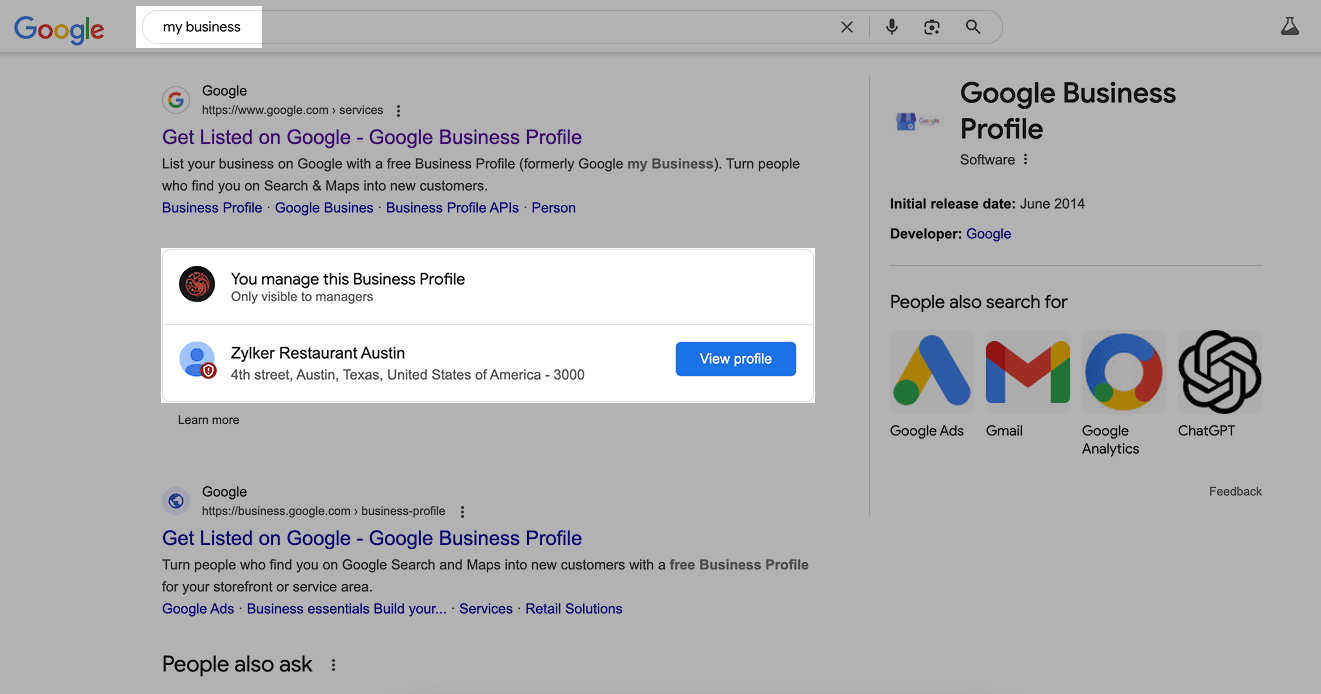
Click Edit profile to edit your business information.

What to edit
Your GBP will be the first point of contact with customers. Keeping it updated with the latest information isn't a good-to-have, it's a must-have and a critical component of your online strategy.
Utilize everything to give potential customers all possible information.
Business category
Now, select a primary category that best describes the core product or service your business offers. In other words, think about the one or two words you'll use when explaining what your business is all about. Choosing the right category improves your local ranking.
Be as specific as possible. For example, if you own a restaurant specializing in seafood, go for "Seafood restaurant" instead of "Restaurant."
In addition, add secondary categories that describe your business as a whole. Avoid choosing too many categories as it may not convey what exactly you do or will dilute the core offering.
Important:
Attributes may vary based on the business category. You might see links for online orders, reservations, or appointments.
Be cautious when updating core details like your business's name, category, address, phone number, or website. Certain changes may trigger Google to flag or suspend your profile, requiring re-verification.
Business description
You can utilize this space to explain your business in more detail. Express the whys, hows, and whats; and include the history, nature, and mission of the business to give potential customers a more complete idea of what your business is about. There is a 750-character limit for this description.

What not to do
Stuffing the description with keywords
Adding website/social media links
Mentioning special discounts or offers
Poor formatting like using all caps, misspellings, or extra spacing
Check out Google's prohibited & restricted content to learn more about what to avoid.
Opening date
Adding an opening date will be helpful to add a hint of trust; a note of "__ Years in Business" will be displayed when your profile is viewed on Google's Local Pack.
Phone numbers
You can add one primary phone number and up to two additional ones. Only mobile and landline numbers are allowed; fax numbers cannot be added. Phone calls are the go-to method of many people to connect with businesses, so make sure you don't miss out on this.
If needed, you can hide the phone number through the Advanced Settings.
Chat
Enter a phone number and WhatsApp click-to-chat link to engage with customers by text message and directly on WhatsApp.

If you're unfamiliar with WhatsApp's click-to-chat link, use https://wa.me/<number>, replacing <number> with the full phone number in international format. Do not include any zeroes, brackets, or dashes—just the country code followed by the phone number.
Website
This can be a doorway for customers to learn who you are, what you represent, and what you stand for, increasing the chances of customers buying from you. If you're operating in multiple locations, link the landing page of each location as a best practice. Include the top keywords and talk about the primary category a bit to positively impact your Local Pack ranking.

Location and areas
Physical businesses
Use your real business address—no PO boxes or virtual offices. Suite numbers and floors are fine, but make sure your location has clear signage. If you're in a co-working space, it must have your business name displayed, be staffed, and be open to customers during business hours.

Service-area businesses
If you go to customers instead of having a storefront, set up one profile for your main office and add a service area. Virtual offices don’t count unless staffed. If you’ve got multiple locations, each needs its own team. Keep your service area reasonable—usually within a two-hour drive.

Opening hours
Setting your business hours accurately on Google isn’t just a small detail—it’s a must if you want customers to find and trust you. Nobody likes showing up to a closed store after checking the hours online.

Regular hours: These are your standard business hours. Set them up properly so customers always know when they can visit.
Special hours: Use this feature for holidays, events, or one-off changes. Whether it’s a public holiday or a team outing, updating these in advance saves customers frustration.
Accurate hours mean fewer disappointed customers and more trust in your business. If you’re open late for special occasions—like a toy store extending hours before Christmas—update your profile so customers know.
Attributes
Attributes are simple facts or features about your business that appear on your profile. They help customers quickly learn what you offer and can boost your visibility in local search results.
What are attributes?
Attributes are mini statements or tags that describe your business’s services, amenities, identity, and accessibility features. For example, you can indicate if your business has outdoor seating, free Wi-Fi, wheelchair accessibility, or if it’s women-owned or veteran-owned. These attributes show up in your business profile and sometimes as icons or justifications in search results, helping customers find exactly what they’re looking for.

Attributes fall into several categories, including:
Accessibility (e.g., wheelchair-accessible entrance, restroom, seating, parking, elevator)
Business identity (e.g., Black-owned, Latino-owned, LGBTQ+ owned, women-owned, veteran-owned)
Service options (e.g., takeout, dine-in, online appointments)
Amenities (e.g., Wi-Fi, outdoor seating)
Payment methods (though some payment attributes have been deprecated in certain regions)
Crowd attributes (e.g., family-friendly, kid-friendly, LGBTQ+ friendly)
Planning attributes (e.g., appointment required, reservations recommended)
Recycling options (e.g., battery recycling, glass bottle recycling)
Important: The exact attributes available depend on your business category and location.
Why are attributes important?
Stand out in search results: Attributes can trigger special icons and justifications that catch the eye of potential customers.

Improve local SEO: Google uses attributes to match search queries with businesses that meet those criteria, increasing your chances of appearing in relevant searches.
Build trust and connection: Identity attributes like “women-owned” or “veteran-owned” resonate with customers who want to support specific communities.
Enhance customer experiences: Attributes like “wheelchair accessible” or “curbside pickup” provide useful information that helps customers decide if your business fits their needs.
Increase visibility for niche searches: For example, searches like “wheelchair accessible restaurants near me” or “Black-owned coffee shops” are more likely to show businesses with those attributes.

How to add and manage attributes
On Google Search, click Edit profile; on Google Maps, select Manage your Business Profile and then click Edit profile.
Go to the More tab.
Choose the attribute category you want to update (e.g., Amenities, Service options).
Select Yes or No next to each attribute.
Click Save.
Google will review your changes, usually within 10 minutes, but sometimes it can take up to 30 days.
How user-generated attributes affect your profile
Some attributes are crowd-sourced or based on customer reviews and third-party references. For instance, if many customers mention “great dessert” in reviews, Google may highlight that as an attribute on your profile. Similarly, positive mentions in local publications can lead to attributes like “On critic’s lists.” While you can’t directly control these, encouraging satisfied customers to leave detailed reviews can help.
Best practices for using attributes
Choose relevant attributes: Only add attributes that truly apply to your business to maintain accuracy and trust.
Keep attributes updated: Regularly review and update your attributes as your business evolves or offers new services.
Prioritize impactful attributes: Focus on three to four key attributes that differentiate your business rather than overloading your profile.
Monitor customer feedback: Customers can suggest attributes via reviews, so keep an eye on what they say about your business.
Leverage seasonal or event-specific attributes: For example, toggle attributes like “Appointment required” during busy periods.
Final thoughts
Getting your Google Business Profile set up and verified is the foundation. Whether you’re claiming an existing listing or creating a new one, it’s all about making sure the right people (that’s you!) have control. Once you're verified, filling in accurate business details and attributes helps build trust with both Google and your customers. The more complete and consistent your profile is, the better your chances of showing up at the exact moment people are searching for what you offer.
Comments