
Integrate Razorpay with Zoho Billing
Razorpay is a secure and efficient payment gateway that enables businesses to accept one-time and recurring payments through multiple payment methods, including credit cards, debit cards, net banking, UPI, and wallets. Integrating Razorpay with Zoho Billing allows you to seamlessly collect payments from various countries and currencies and reconcile transactions.
ON THIS PAGE…
Set Up Razorpay
Connect Razorpay
To get started, you will have to connect your Razorpay account with Zoho Billing. If you don’t have an account, you can create one and proceed with the integration.
To set up:
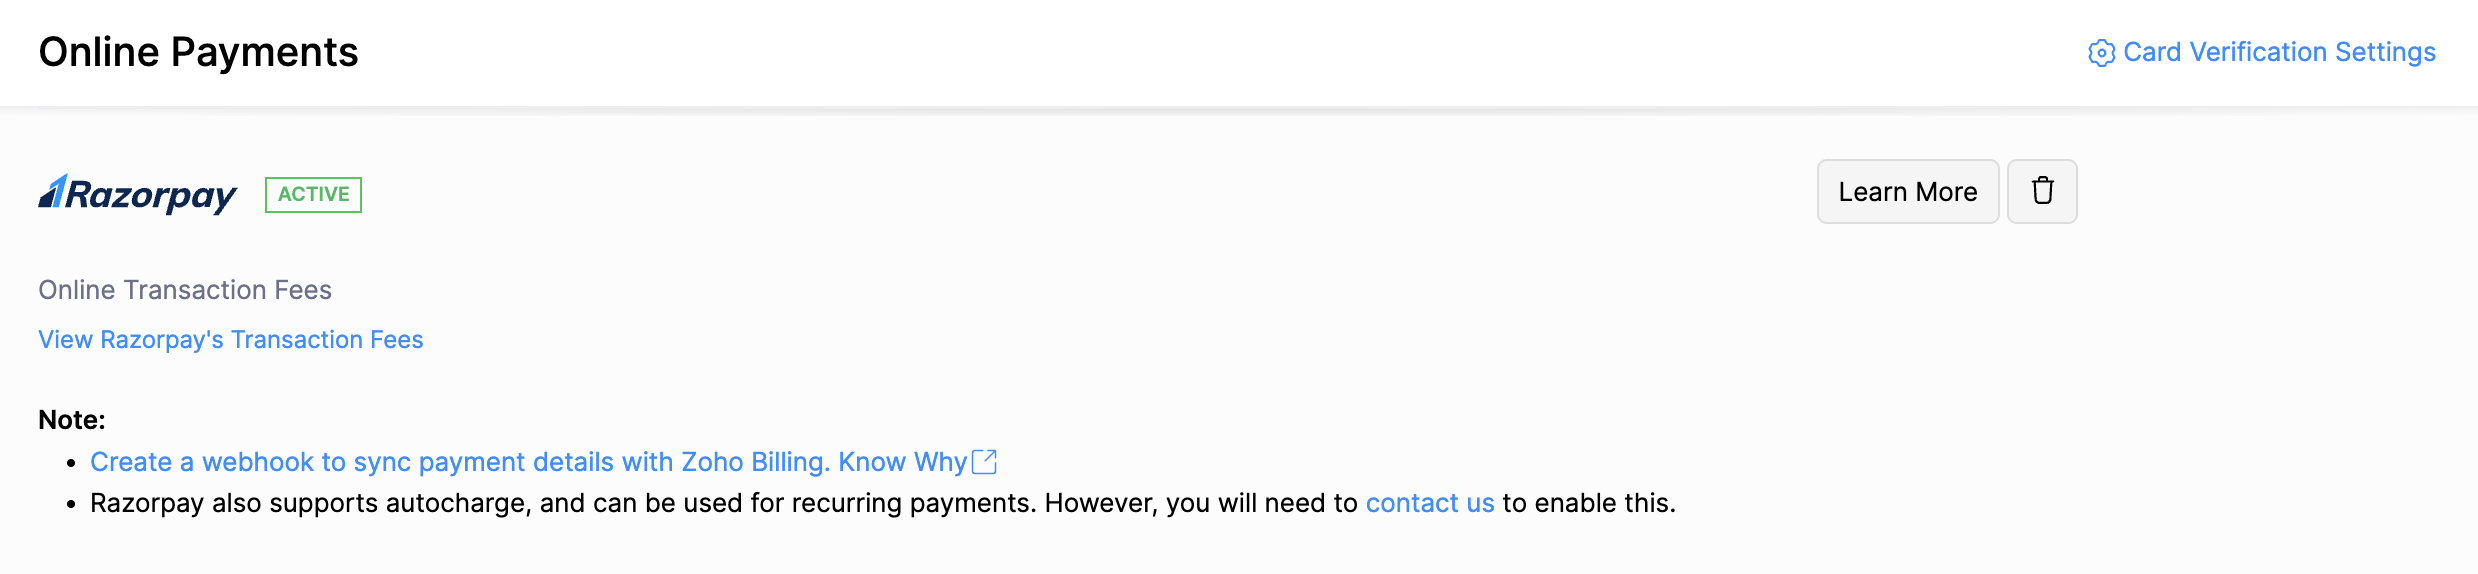
- Go to Settings from the top-right corner.
- Select Payment Gateways under Online Payments.
- Click Set Up Now next to Razorpay. You will be redirected to Razorpay’s login page.
- Enter your Email Address or Mobile Number, and click Next.
- Enter your Password, and click Login.
- In the following page, click Authorize.
You will have connected Razorpay with Zoho Billing.
Configure Webhooks
After connecting Razorpay with Zoho Billing, you will have to configure a webhook for Razorpay. This is to ensure that Zoho Billing is notified about the payment statuses and payments do not fail to be recorded in Zoho Billing. This involves copying the webhook URL from Zoho Billing and then setting up webhooks in your Razorpay account. Learn why you should configure webhooks for Razorpay.
To copy the webhook URL from Zoho Billing:
-
Go to Settings from the top-right corner.
-
Select Payment Gateways under Online Payments.
-
Click Create a webhook to sync payment details with Zoho Billing next to Razorpay.
-
Copy the Webhook URL from the 4th step in the following popup.
Once you have copied the webhook URL from Zoho Billing, you can configure webhooks in Razorpay.
To configure webhooks in Razorpay:
-
Log in to your Razorpay dashboard.
-
Go to Account & Settings and select the Webhooks under Website and app settings.
-
Click Add New Webhook.
-
Paste the URL copied from your Zoho Billing account in the Webhook URL field.
-
Check payment.authorized and payment.captured under Payment Events.
-
Click Create Webhook.
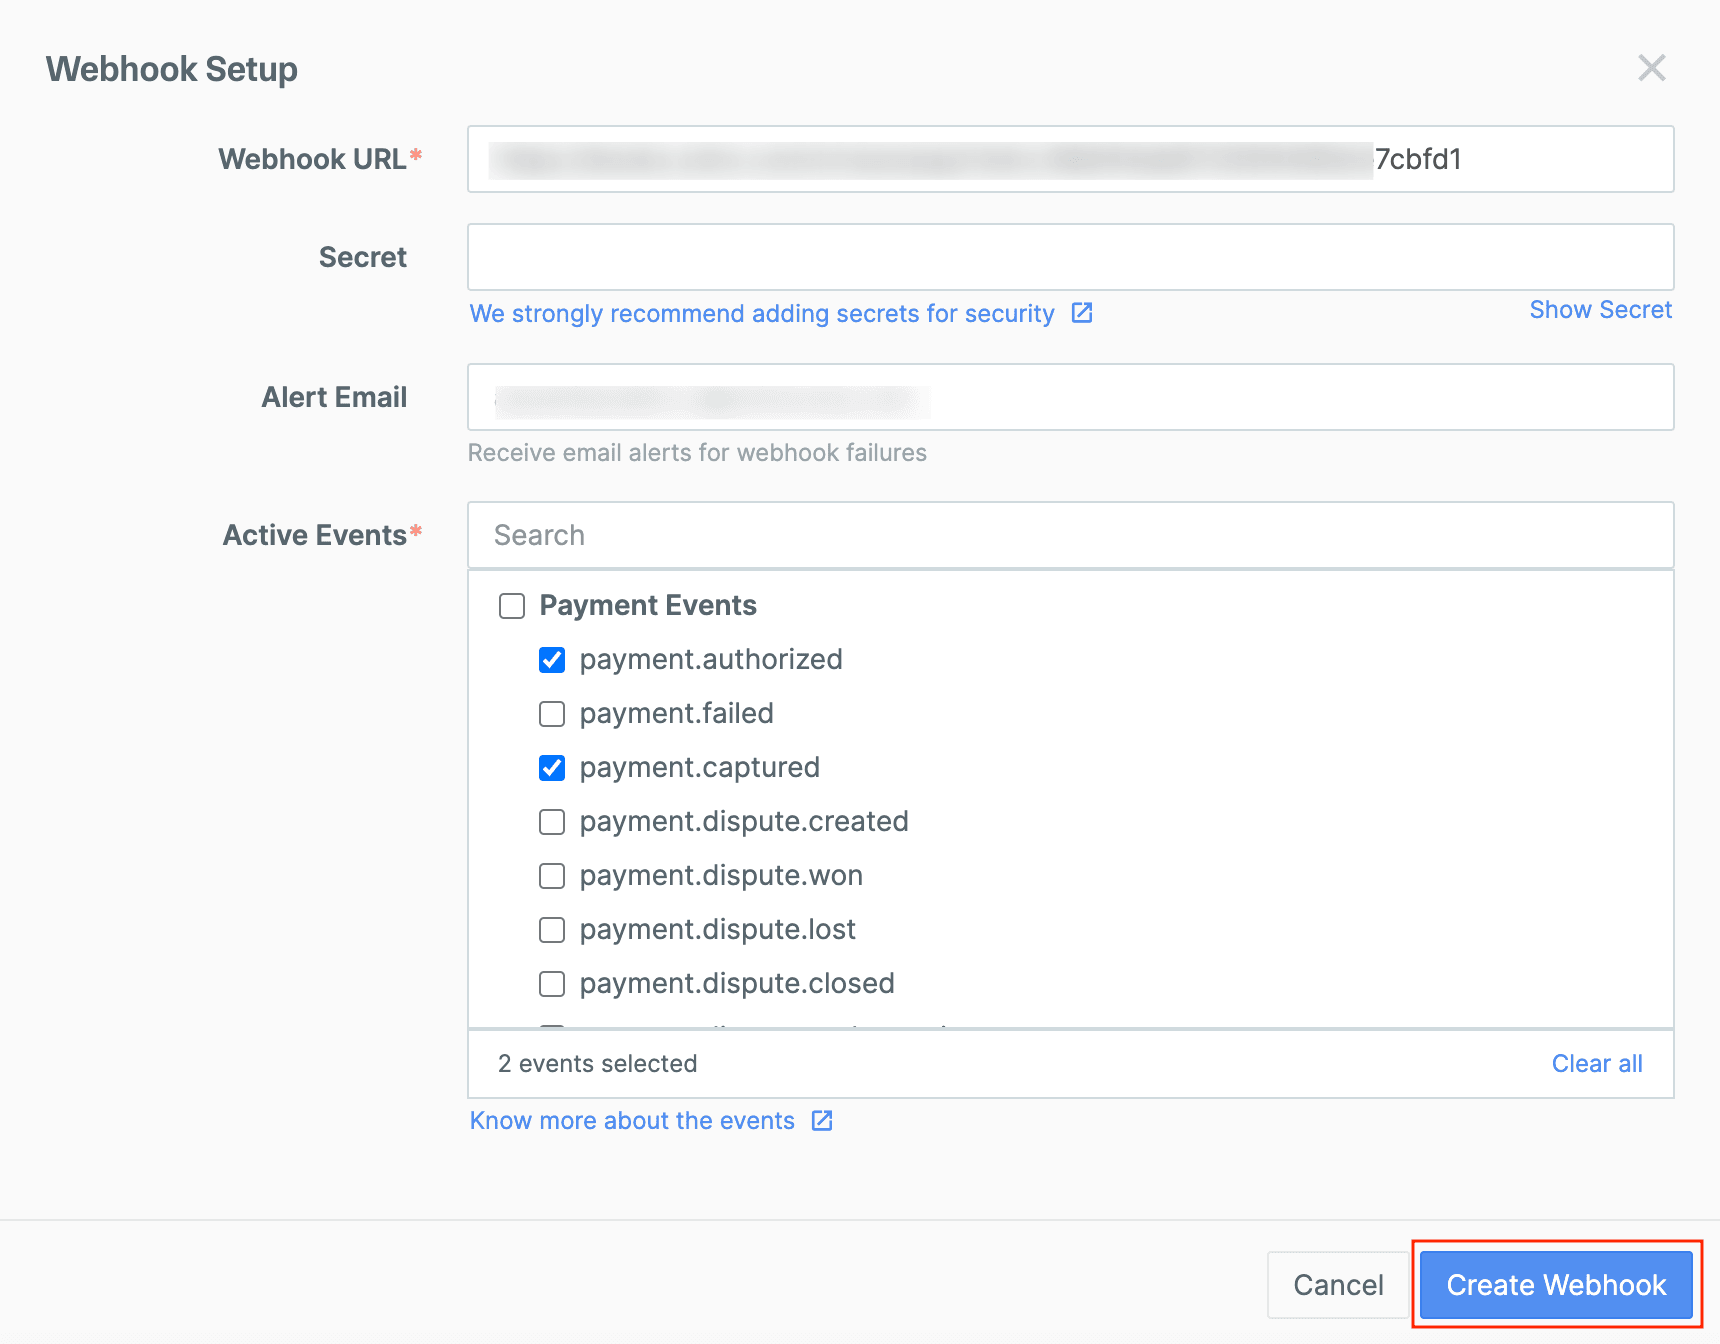
You will have created a webhook, and the payment details will be synced with Zoho Billing.
Collect Customer Payments
Enable Payment Options
After setting up the integration in Zoho Billing, enable Razorpay as a payment option in invoices to receive payments.
To enable Razorpay:
-
Go to Invoices under Sales.
-
Create a new invoice with the necessary details or click Edit on the particular invoice.
-
Scroll to the bottom of the page and check Razorpay as a payment option.

- Click Save.
Razorpay will be chosen as the payment option to collect payments.
Receive Payments from Customers
After you’ve enabled Razorpay as a payment option, your customers can pay through the customer portal.
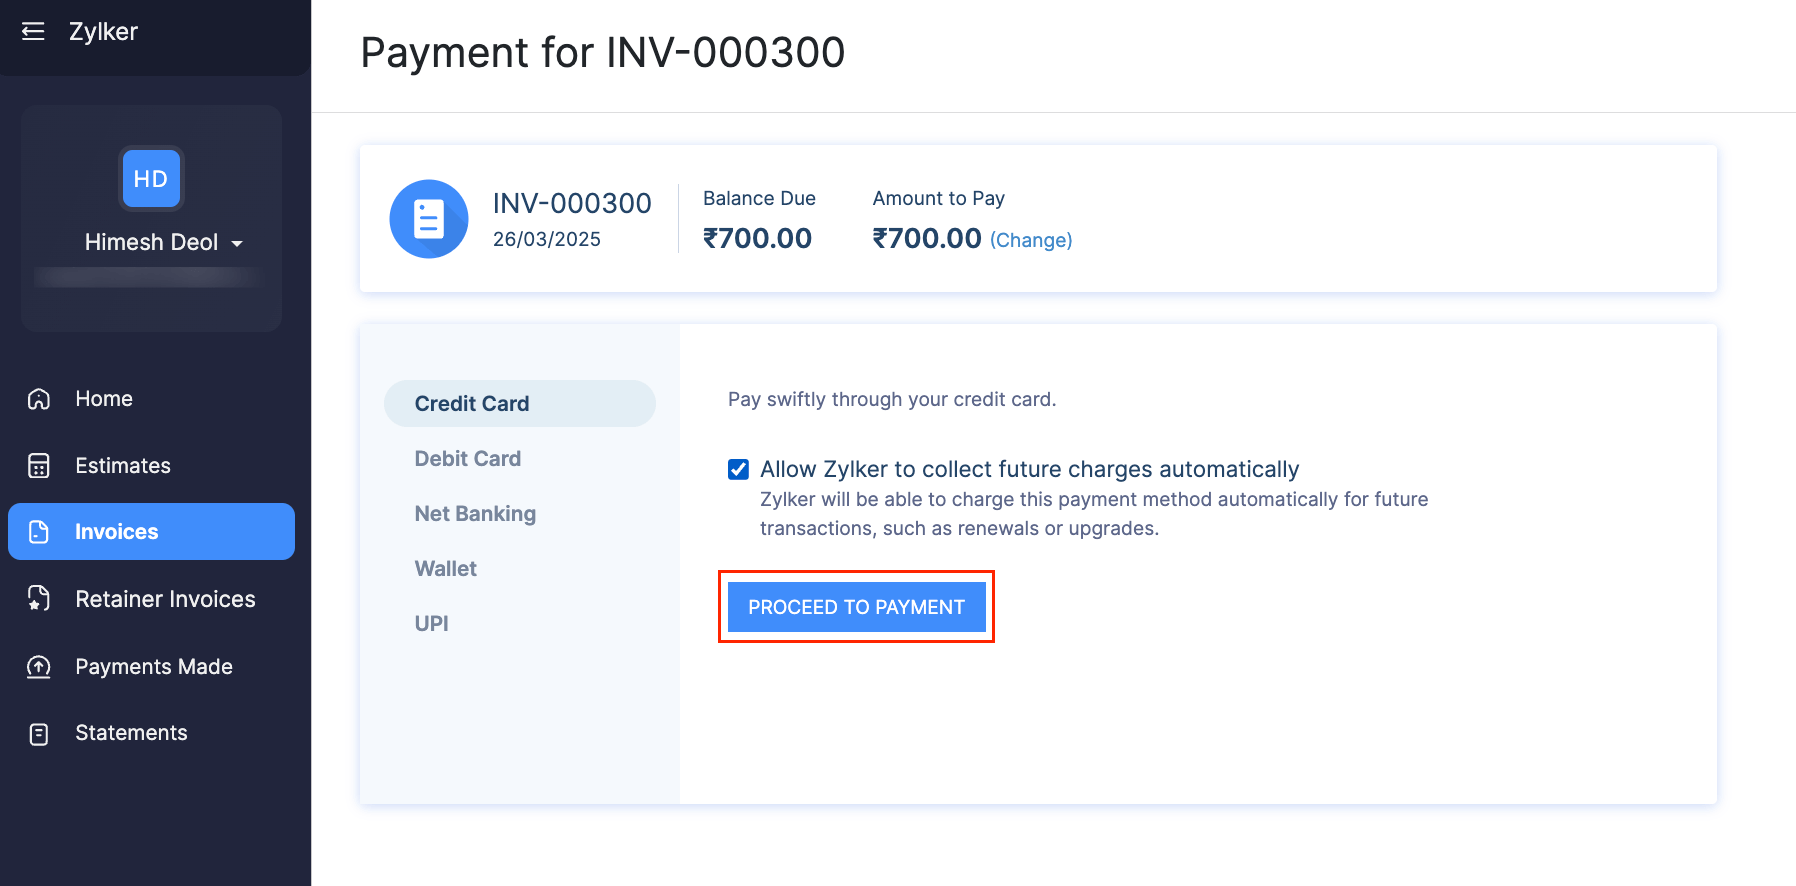
To make payments, your customers will have to:
-
View the invoice from the customer portal.
-
Click Pay Now, and they will be redirected to the payment page.
-
Select a payment method and click Proceed To Payment. They will be redirected to Razorpay’s payment page to enter their payment information and complete the transaction.
Your customers can also make payments from the secure payment page shared with them via email or shared URL.
Once the payment is successful, you will receive an email regarding the payment made by your customer, and the invoice’s status will be marked as Paid.
Auto-Charge
Once your customer saves their card details in the customer portal their card will then be automatically linked to their subscriptions.
Your customer’s card will be automatically charged when their invoice is due.
Delete the Integration
If you no longer want to use Razorpay integration, you can delete it. Before deleting, uncheck Razorpay as a payment option in unpaid invoices and delete any associated cards.
To delete:
- Go to Settings from the top-right corner.
- Select Payment Gateways under Online Payments.
- Click the Delete icon next to Razorpay.
- Click OK to confirm.
The Razorpay integration will be deleted from your organization.
 Thank you for your feedback!