Integrate Zoho Expense With Google Workspace
Zoho Expense is integrated with Google Workspace to make expense reporting easier with more tools at your disposal. With this integration, you get the best of Zoho Expense’s expense reporting tools combined with Google’s varied collaboration, storage, communication products, and services.
Note: The integration follows Google’s Limited Use requirements to access and share information from Google APIs in a secure way, as permitted by Google.
Prerequisites To Set Up the Integration
- You must have a Google Workspace email address (which is different from your Gmail address).
- This should be the email address used to log in to Zoho Expense.
- You should be an admin in your Google Workspace account.
Setup Google Workspace Integration
Here’s how you can integrate Google Workspace with Zoho Expense:
- Click Admin View on the left sidebar.
- Go to Settings on the left sidebar.
(OR)
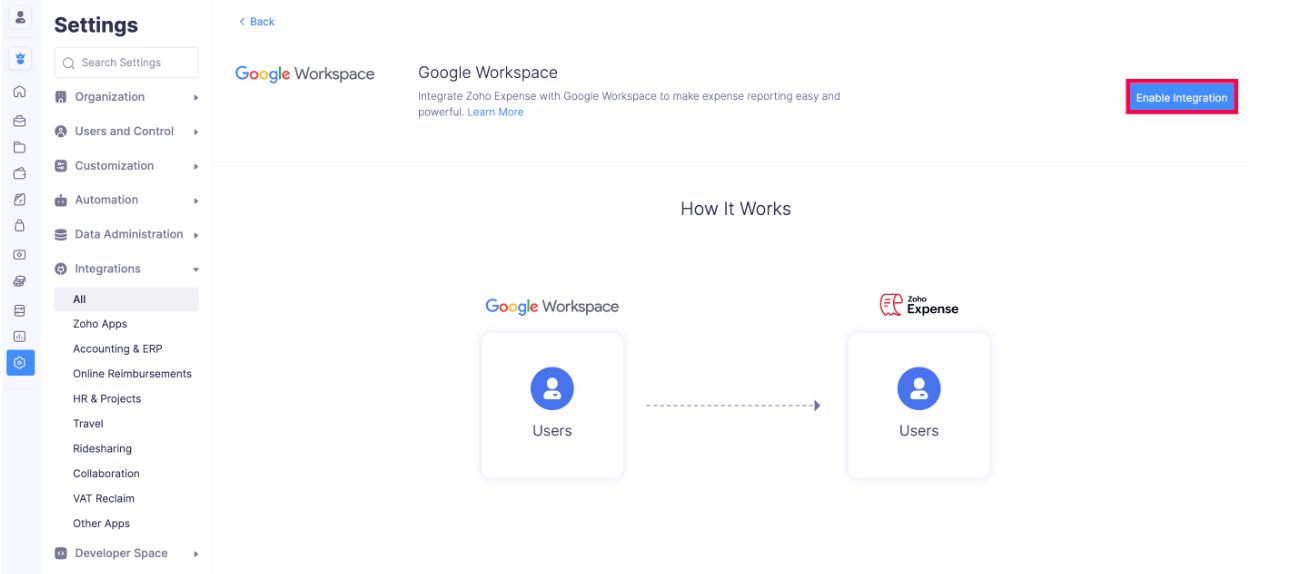
Click Settings in the top right corner of the page. - Select View All under Integrations.
- Click Google Workspace.
- Click Enable Integration.
- Click the get it from the Google Workspace Marketplace button in the Integrate with Google Workspace account pop-up.
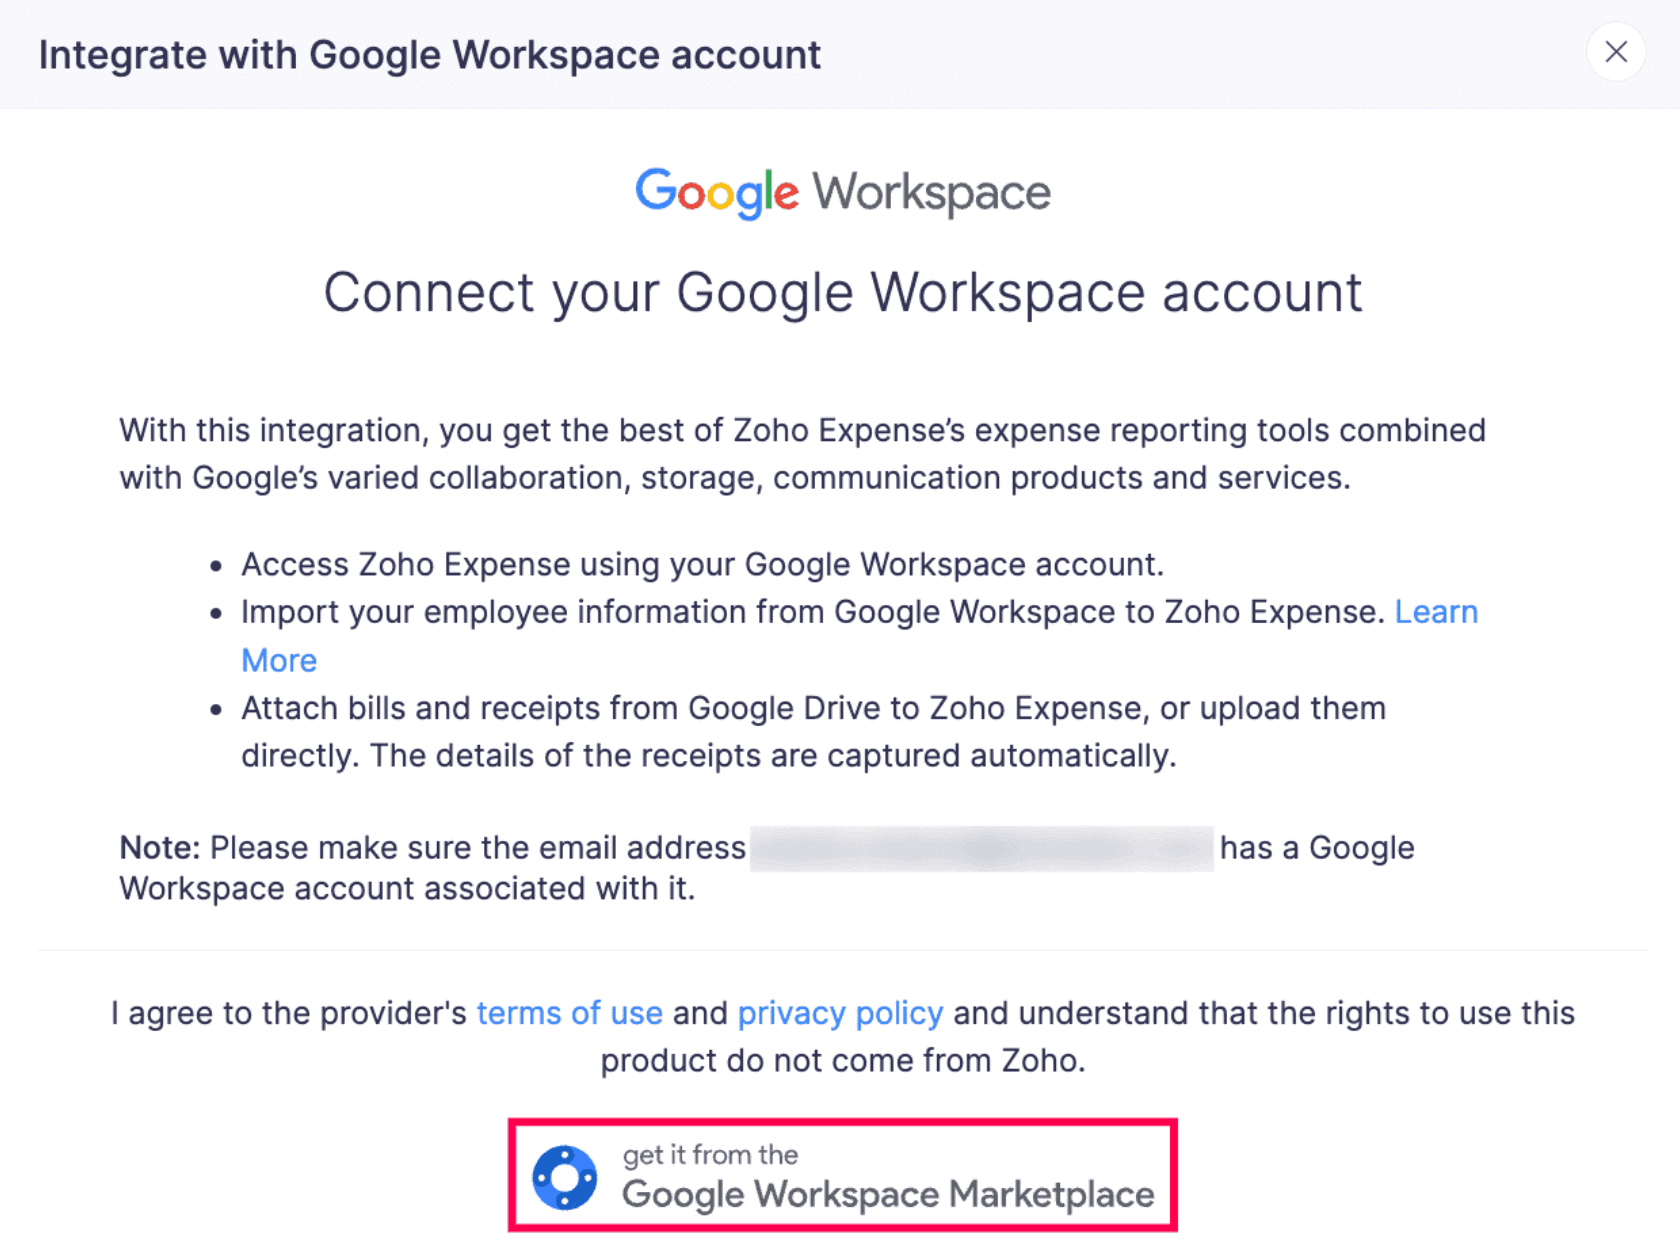
- You will be redirected to the Google Workspace Marketplace.
- Click Admin install or Individual install next to Zoho Expense.
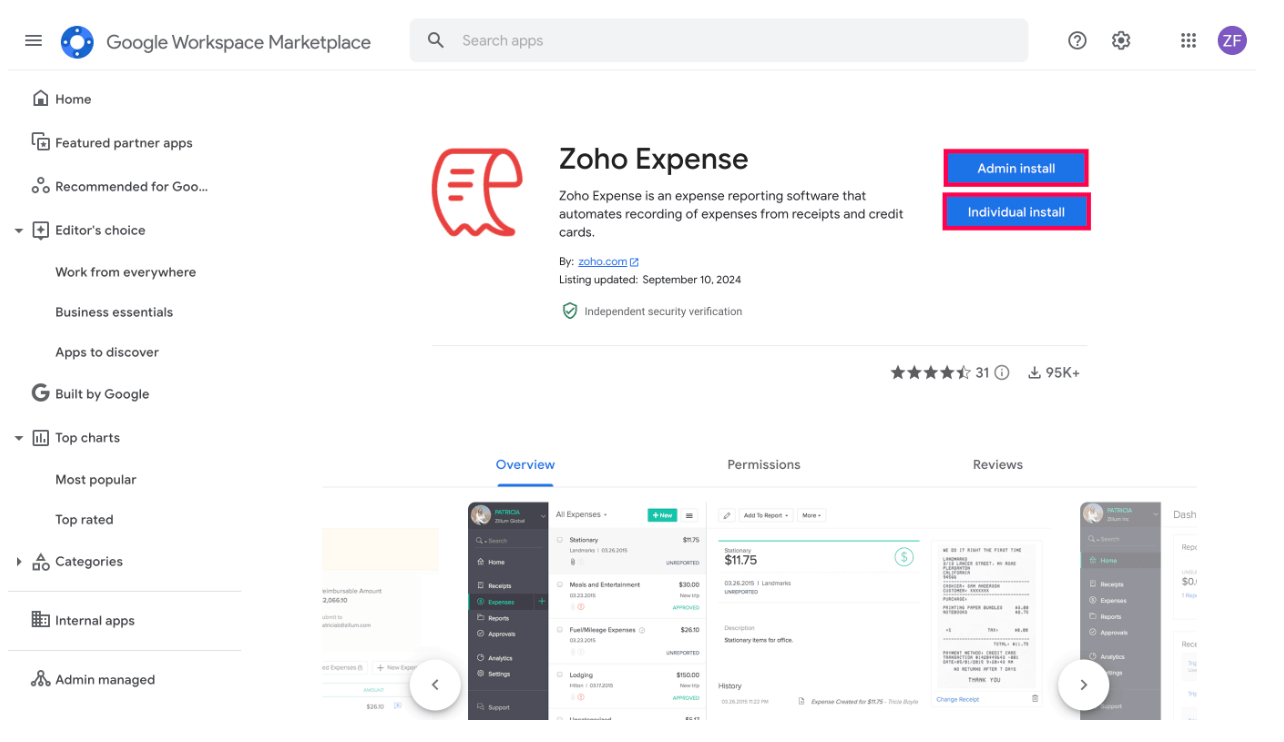
- If you’re an admin in the Zoho Expense organization and have users, click Admin install to install the Zoho Expense app for you and your users in the organization.
- Click Continue to provide permission in the pop-up.
- Select if you want to enable the integration for all the users in your organization or only to specific groups or organizational units.
- Read and agree to the application’s Terms of Service, Privacy Policy, and Google Workspace Marketplace’s Terms of Service and click FINISH.
- If you choose to install Zoho Expense only for specific users, click NEXT, and you’ll be redirected to the Select Users page.
- Select the Groups and Organizational units and click FINISH.
- Whereas, if you click Individual install, the Zoho Expense app will be installed only for you.
- In the next page, select the required Google Workspace account.
- Zoho Expense will now be installed in your Google Workspace.
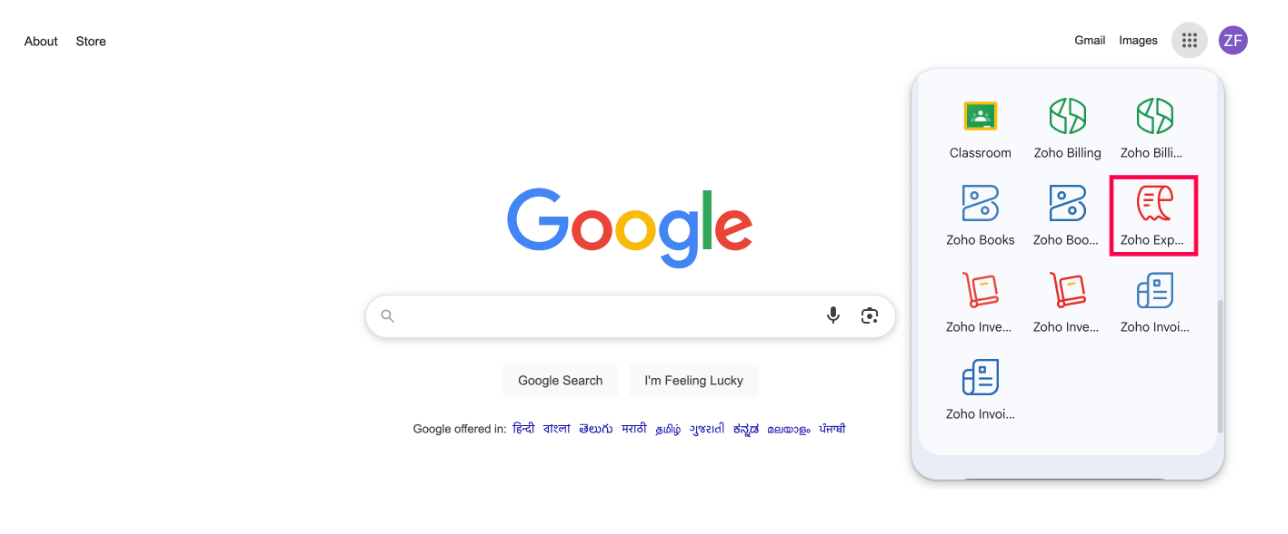
- Once installed, scroll through your application list and select Zoho Expense.
- Link your organization in Zoho Expense to your Google Workspace account.
Import Users
Here’s how you can import users from Google Workspace to Zoho Expense:
- Click Admin View on the left sidebar.
- Go to Settings on the left sidebar.
(OR)
Click Settings in the top right corner of the page. - Go to Users under Users and Control.
- Click the More icon in the top right corner of the page.
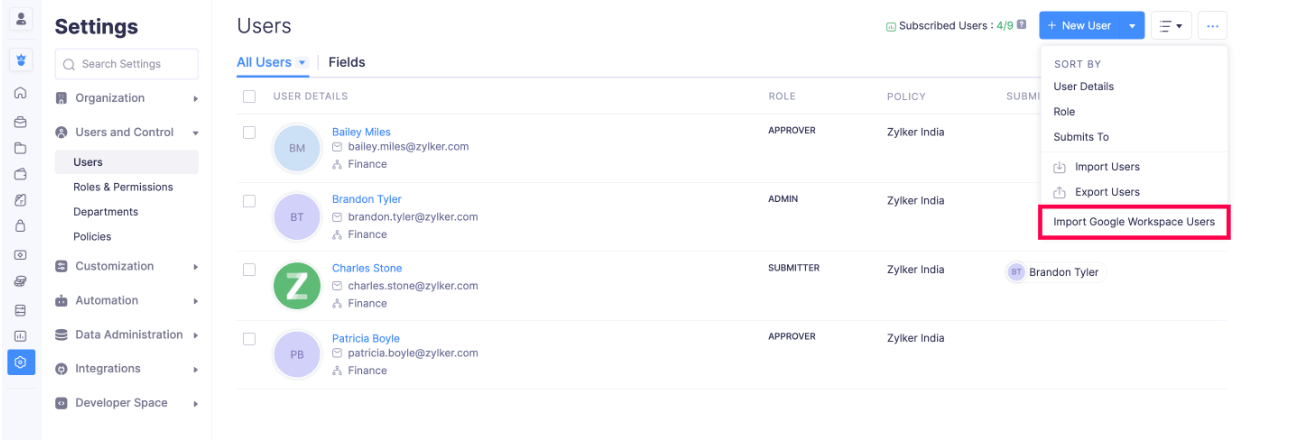
- Select Import Google Workspace Users. On the following screen, select the Google Workspace users to be imported and choose their role in Zoho Expense.
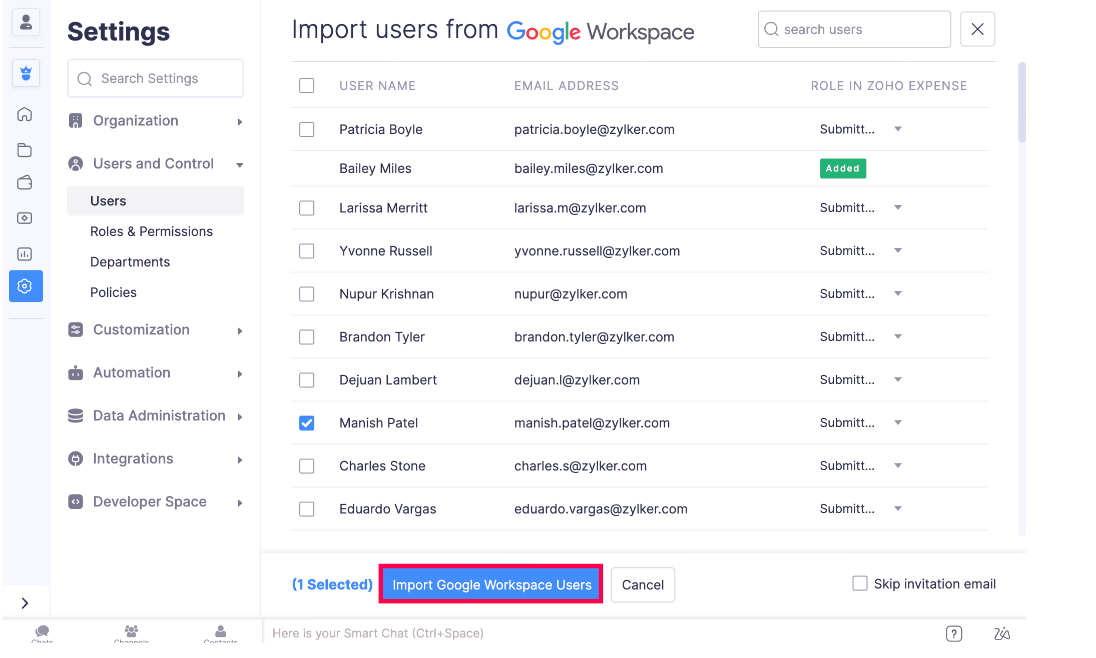
- Click Import Google Workspace Users.
Disconnect Google Workspace Integration
Note: Once you disconnect the Google Workspace integration, you will not be able to import users from Google Workspace.
Here’s how you can disconnect the Google Workspace integration:
- Click Admin View on the left sidebar.
- Go to Settings on the left sidebar.
(OR)
Click Settings in the top right corner of the page. - Select View All under Integrations.
- Click Google Workspace.
- Click Disconnect.
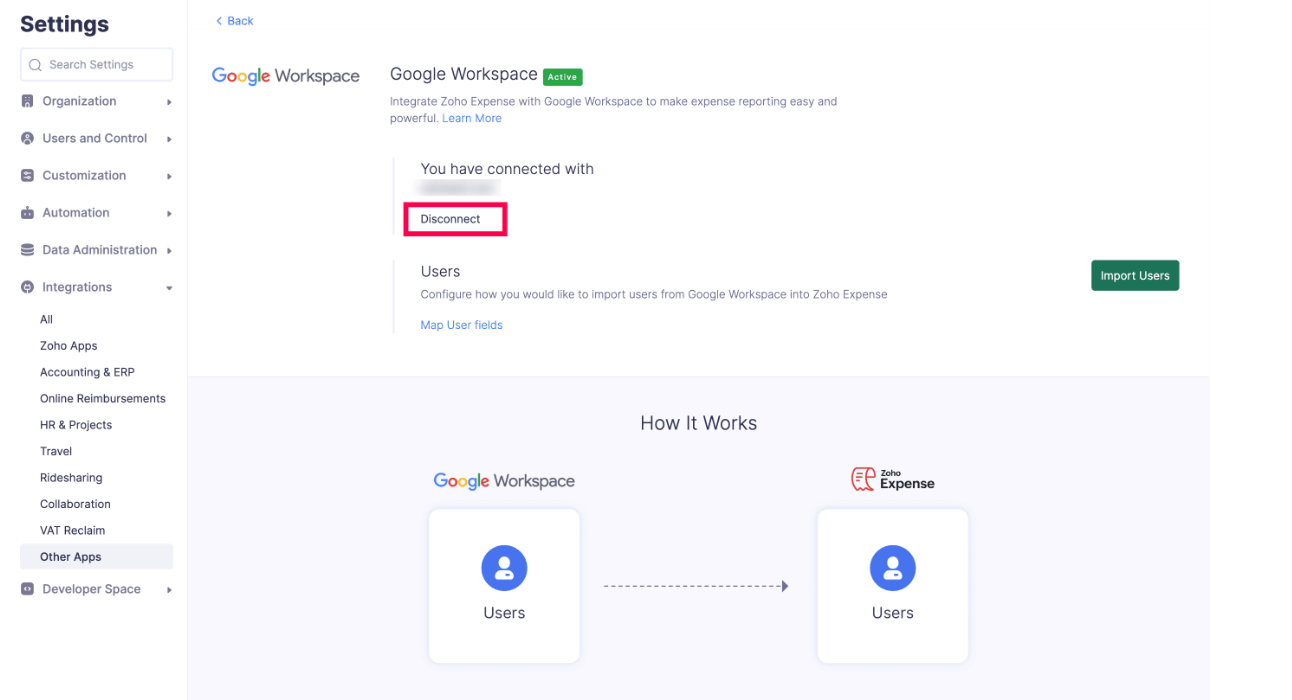
- Confirm your action by clicking Disconnect again in the pop-up.
Meanwhile, the Zoho Expense API installed in your Google Workspace account will still be available under the Google Apps icon. To uninstall it:
- Log in to your Google Admin Console.
- Click Apps on the left sidebar.
- Click Google Workspace Marketplace apps and select Apps list.
- Select Zoho Expense from the list page.
- Click Uninstall App.
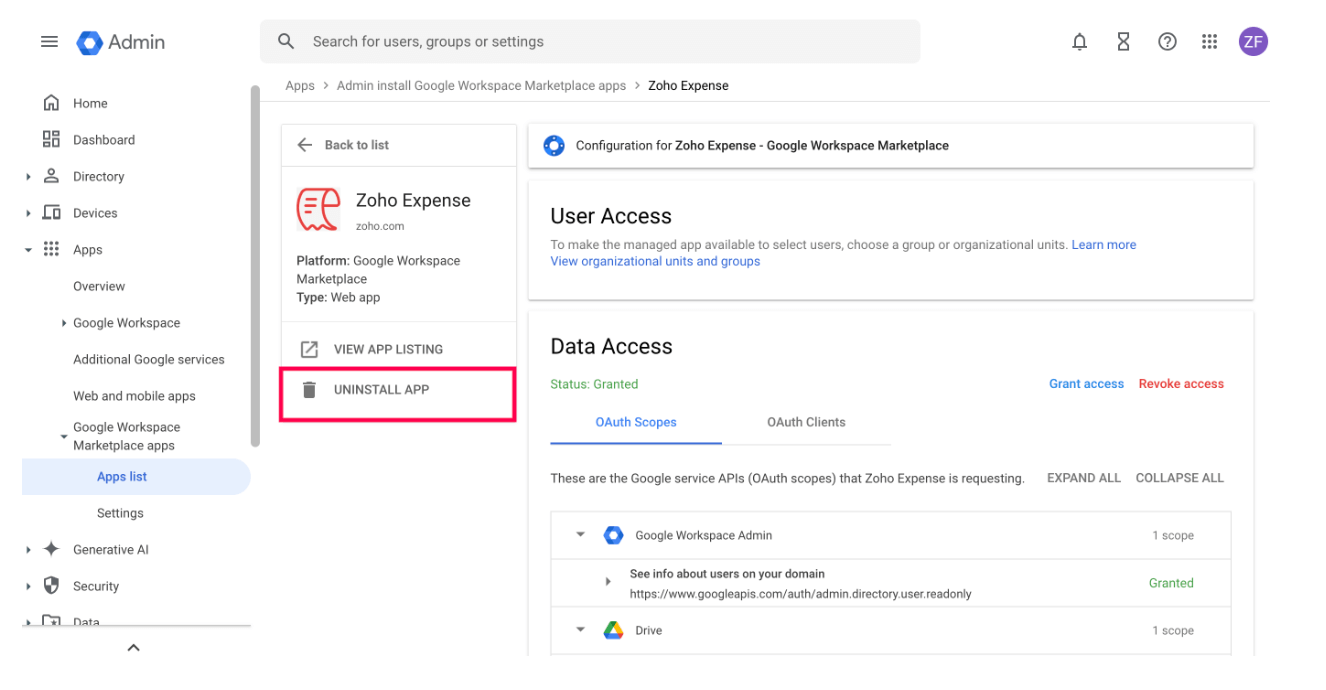
- Confirm your action by clicking Uninstall again in the pop-up.
Zoho Expense will be uninstalled in your Google Workspace.