
Introduction - Customers
In Zoho Billing, you can add customers that you deal with in your business.
For creating sales transaction like invoices, quotes or subscriptions, you will have to add customers in your organization.
There are two ways of adding customers in Zoho Billing:
Create From Customer Creation Page
To create a new customer:
-
Navigate to Customers.
-
Click the + New button in top right corner of the page.
-
Select the Customer Type as Business for B2B customers, or Individual for B2C customers.

-
Enter the details of your customer.
-
Select the Currency they deal in.
-
You can add other details such as their Billing Address and Shipping Address by navigating through the different tabs at the bottom of the page.
-
After entering all the details, click Save.
Fields Description Customer Type Choose Business for B2B customers or Individual for B2C customers. Currency Select the currency which the customer deals in. This currency will be used in all the customers’ transactions. Payment Terms Select the due date by which the customer has to make the payment. Address Add a Shipping and Billing address. Contact Persons Add contact persons to be associated with the customer. Custom Fields Assign a default value for the custom fields of the customer. Reporting Tags Assign a default value for the reporting tags of the customer.
Import Customers
To import customers from other systems:
-
Go to Customers.
-
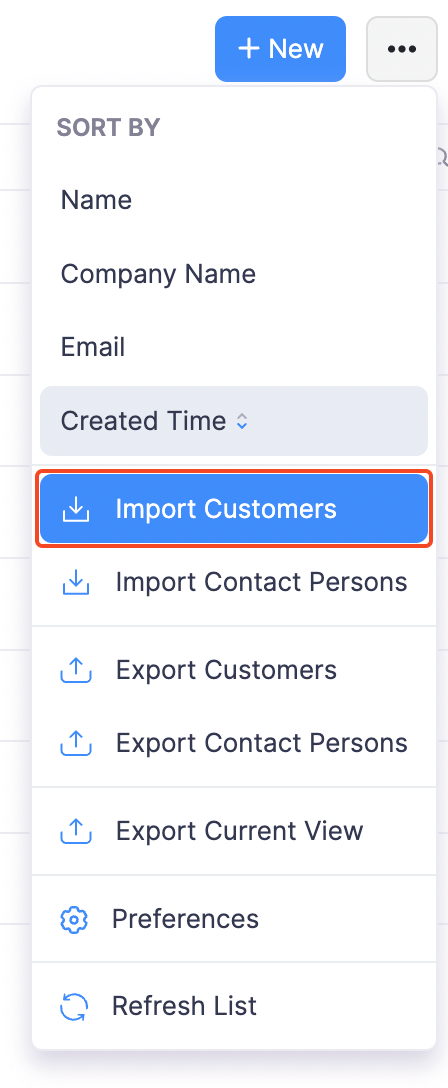
Click the More icon on the top right corner of the page.
-
Select Import Customers
-
Click Choose File and select the file to be imported. You can download a sample file for your reference.
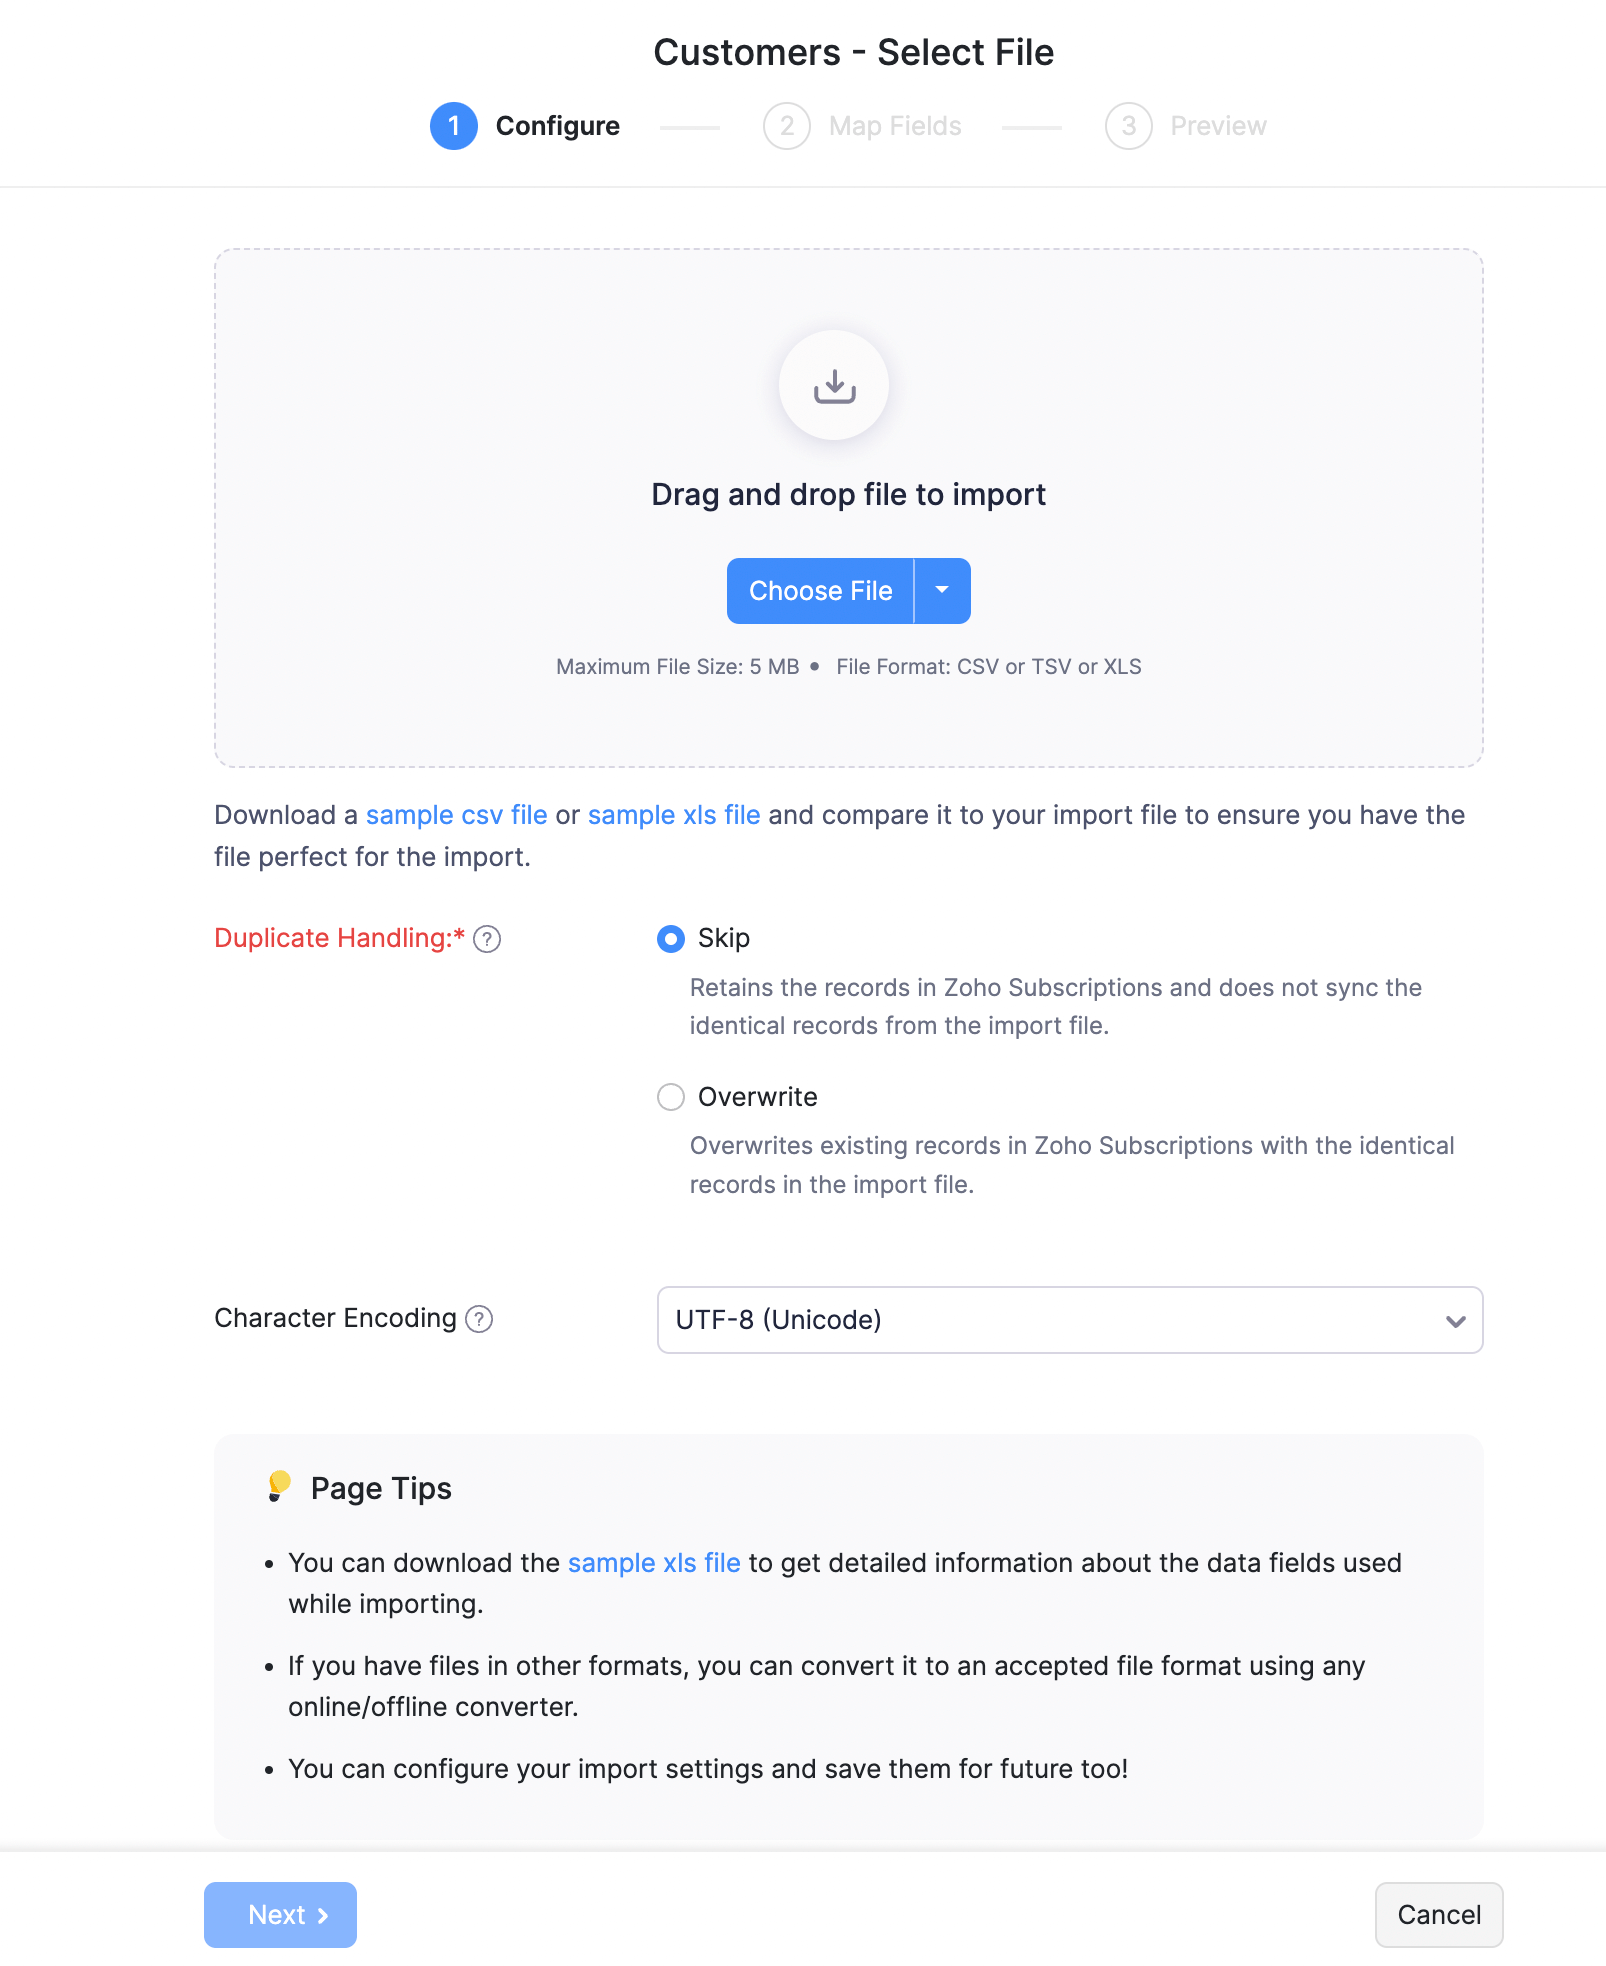
-
Click Next.
-
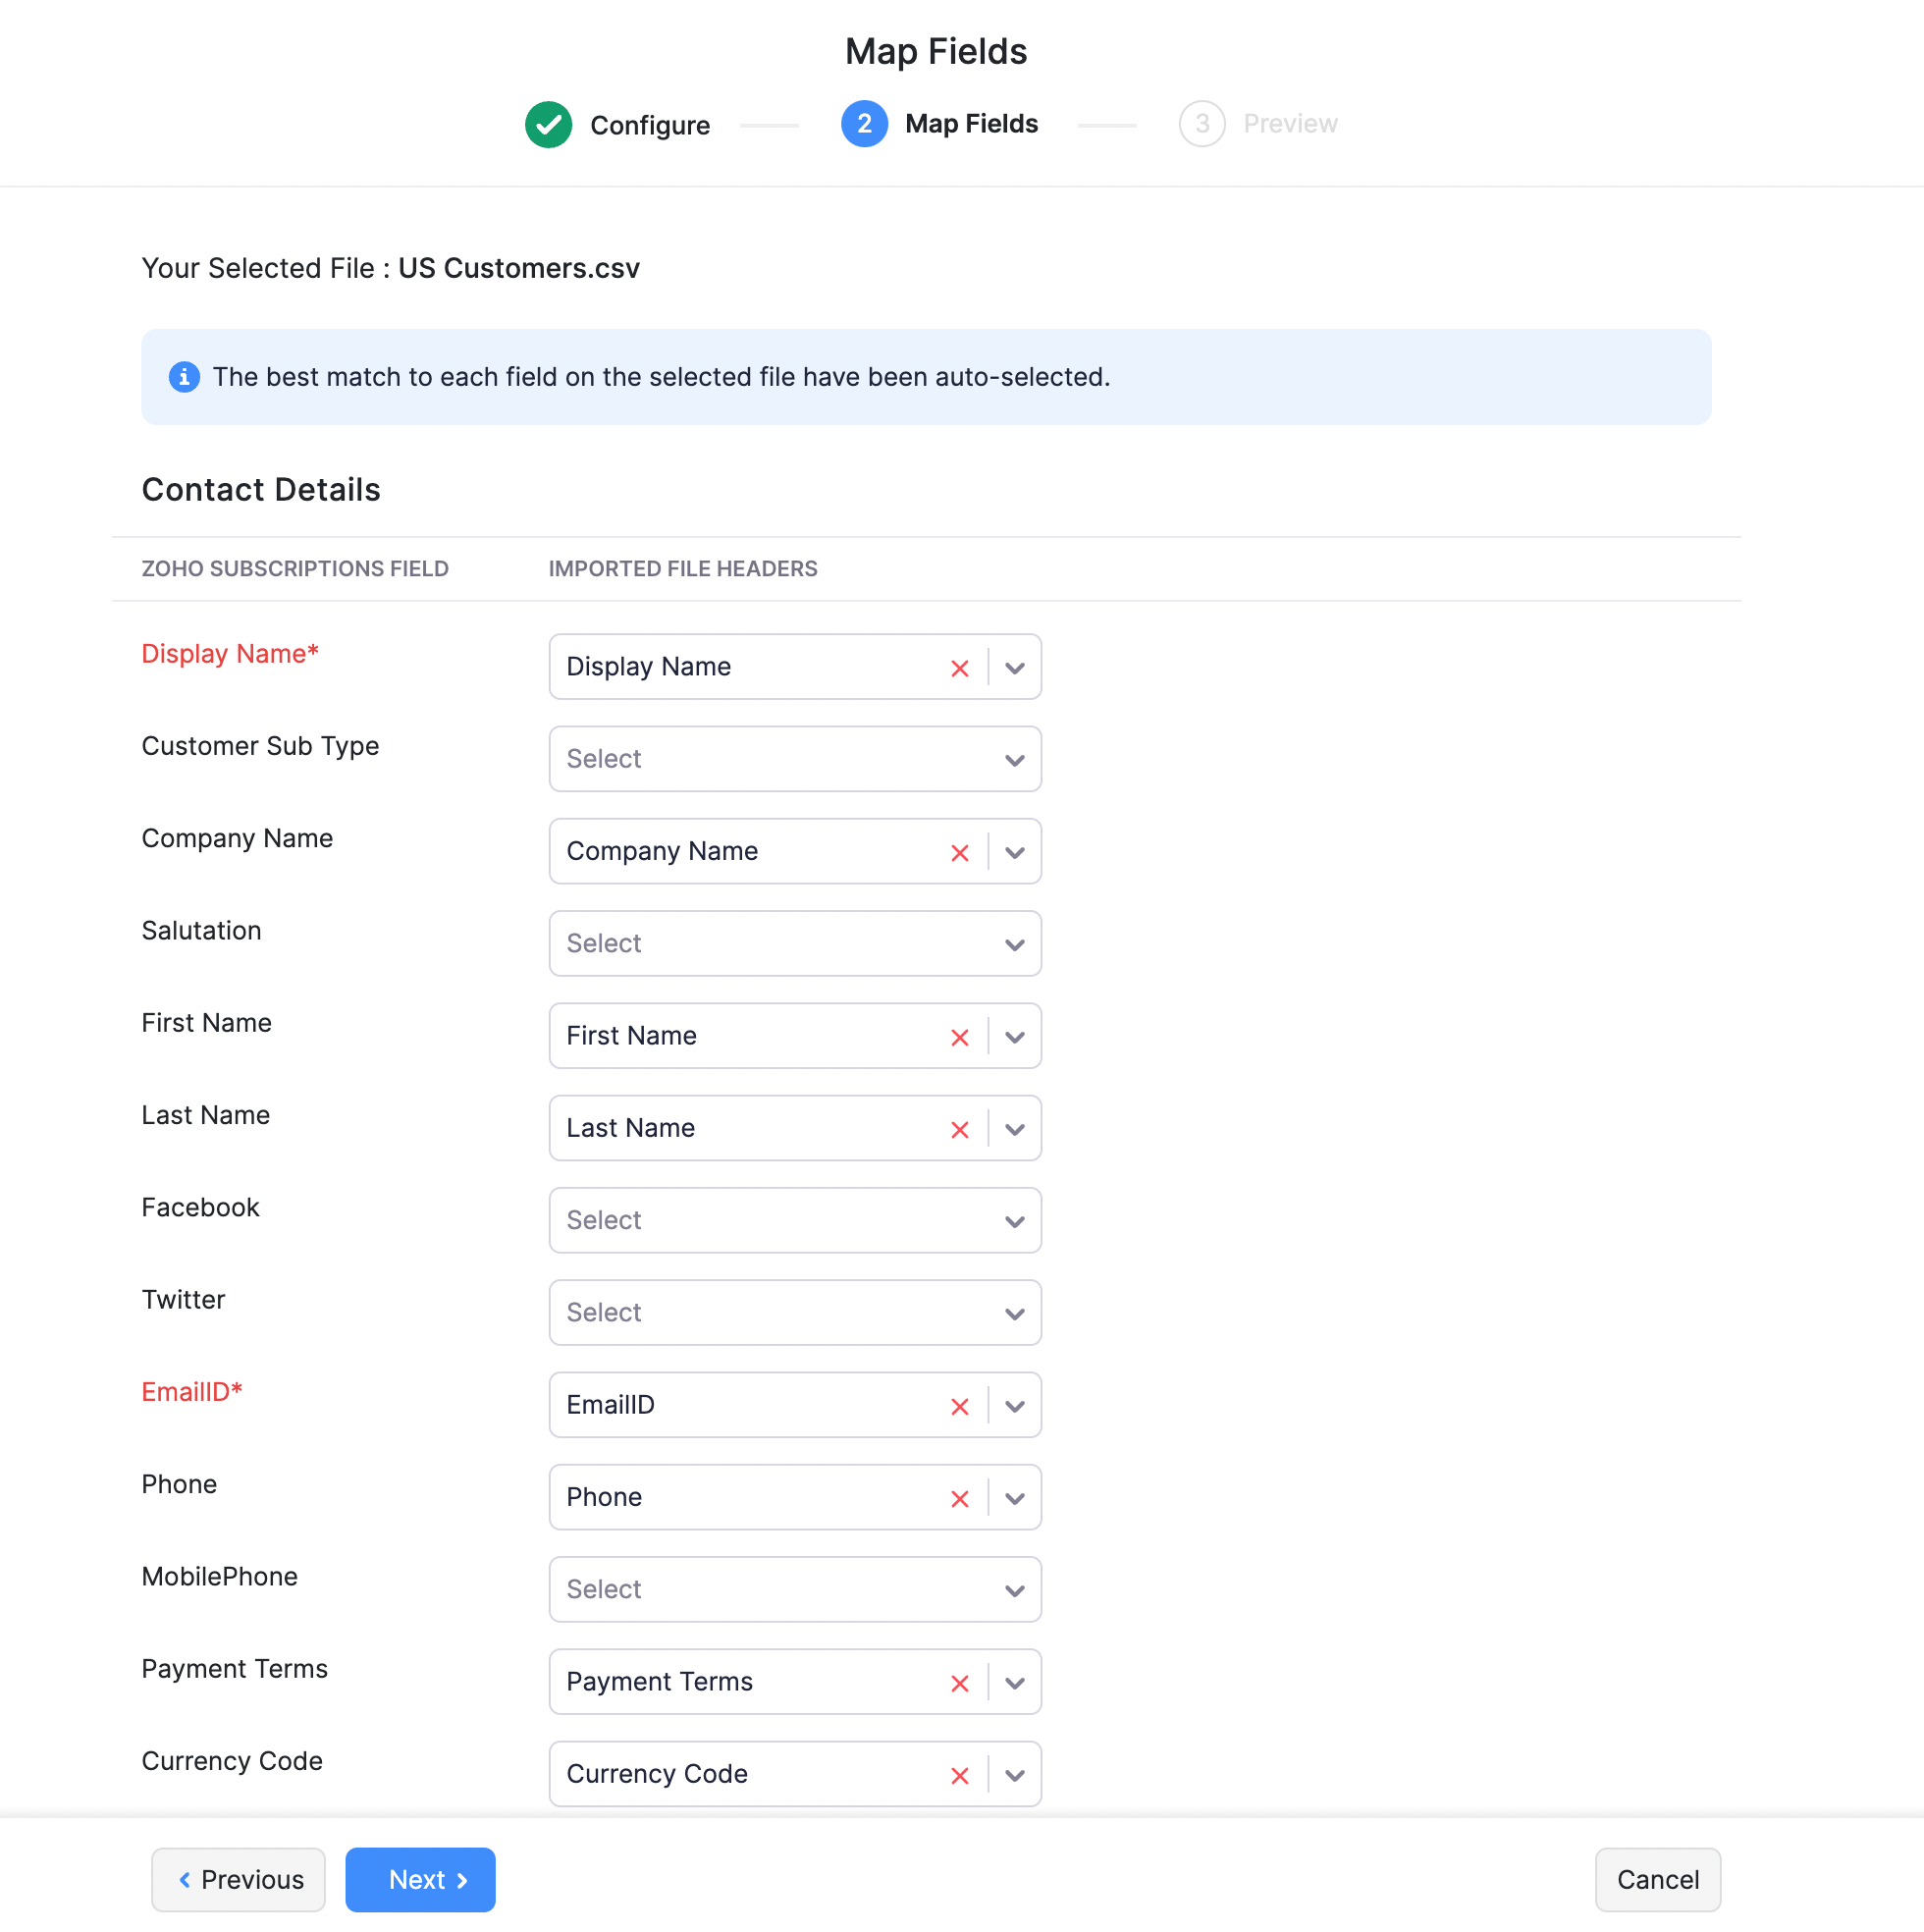
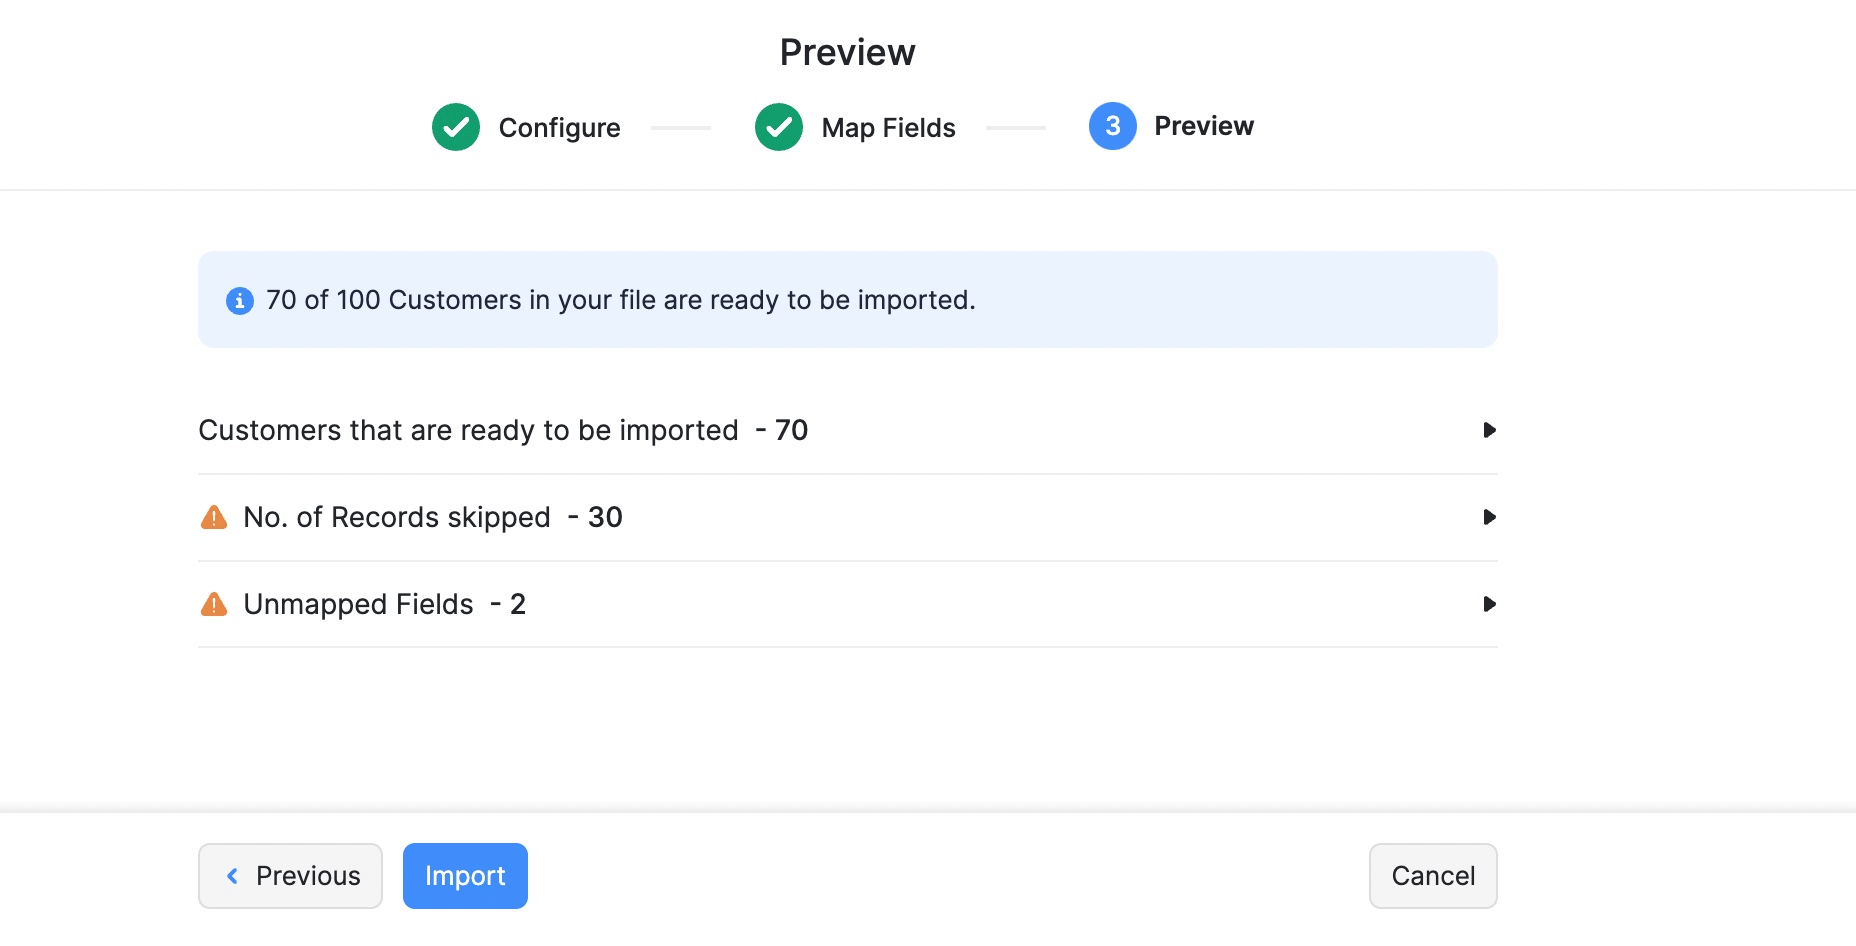
Check the mapping of the fields and click Next.
-
Click Import.
Create From Customer Creation Page
To create a new customer:
-
Go to Customers and click + New.
-
Select the Customer Type as Business for B2B customers, or Individual for B2C customers.
-
Enter the details of your customer.
Fields Description Primary Contact Select a salutation and enter the first and last name of the customer. Display Name Select the name you want to display in all transactions from the dropdown. Company Name Enter the name of the customer’s organization. Email Address Enter the customer’s email address. Phone Enter the customer’s phone number. Communication Channels Mark the channel(Email, SMS) through which you want to communicate with your customers. Currency Select the currency the customer deals in. This will be used in all their transactions. -
Enter the customer’s tax details under Tax Information.
-
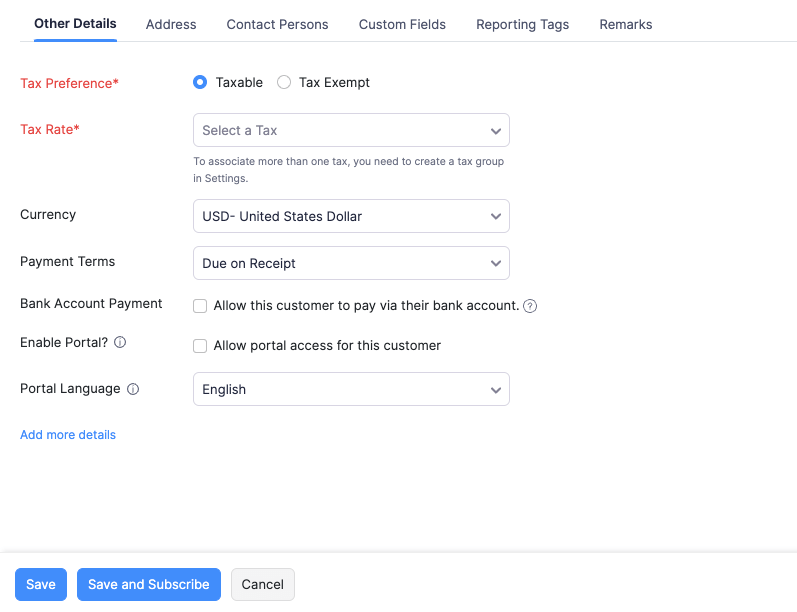
Navigate to the Other Details tab and enter the following details.
Fields Description Payment Terms Select the due date by which the customer should make the payment. Enable Portal Select this option to allow portal access for the customer. Portal Language Select the language in which the customer’s portal should be displayed. Reporting Tags Assign a default value for the reporting tags of the customer. -
Navigate to the Address tab and enter the shipping and billing address of the customer.
-
In the Contact Persons tab, add any contact persons associated with the customer.
-
After entering all the details, click Save.
Import Customers
To import customers from other systems:
- Go to Customers and click the More Actions icon.
- Select Import Customers
- Click Choose File and select the file to import. You can download a sample file for reference.
- Click Next.
- Map the fields appropriately and click Next.
- Click Import.
 Thank you for your feedback!